How to use the freehand Visual Page Editor

Visual Gradient Editor
You can edit the Gradient property visually on the bar, allowing you to add and move stops as bar points for the Gradient. Add the Gradient Stop by clicking on the Gradient Bar. You can drag to the point on the Gradient Bar to move the Gradient Point.
Multi-Layer Background
You can use the Multi-Layer Background on Blocks, Boxes, Grid Cells, and Grid Repeater Items. This option allows you to add creative effects, including masking and shading. You can change the Opacity of the Color Fill layer.

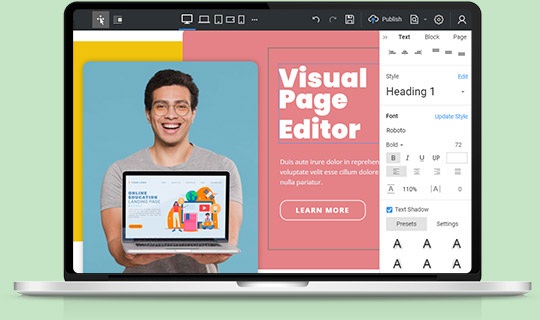
Freehand Drag-And-Drop
Design your web pages and templates by drag and drop. Enjoy your works while building beautiful websites in a playful manner with no coding. Design and customize your design with our revolutionary freehand Editor. It is intuitive, visual, easy-to-use, freehand, drag-and-drop. Using Nicepage is similar to working in Microsoft PowerPoint, Apple Keynote, and professional design systems like Adobe Photoshop and Adobe XD.
Smart Magnetic Guides
Use the Smart Magnetic Guides to align and perfect the position of elements in the design. You can see the quick guides while moving an element that snaps to other elements and containers. They are very helpful for the alignment, editing, and transforming elements relative to other elements and containers when you design a website.
Grid Columns
The Grid Columns are a useful layout tool for graphic and website editors. They facilitate the positioning and alignment of web design elements on a web page. Grid Columns are visible throughout the page. You can enable them by clicking the CTRL+SHIFT+4 hotkeys or selecting in the right-click mouse menu or Page's and Block's сontext toolbar.
Group Elements By Pressing CTRL+G
Grouping is a very common operation that allows combining relative elements and minimizing the load of controlling each element separately while moving, aligning, etc. To group multiple Elements, select area elements or select each by clicking and holding the SHIFT key, and then press the CTRL+G combination.
Drag Elements To Move Group
Drag any grouped element to move the entire Group. You can group elements in a web block and then manipulate them as a single unit by selecting and dragging a group with its inners elements.
Reset proportions for images
May images get their proportions changed during the creative process by zooming and fitting them while building a web page. Therefore, you can reset the proportions to the original by clicking the icon on the Context Toolbar. Click on the Image element, Box, or Grid Cell, and click the Reset Proportions icon.
Custom Border For Each Side
You can add Groups, Shapes, and Images and specify Borders for each side separately. It gives you the additional freedom to realize your creative ideas. Select your Shape, for example. Then go to the Property Panel. Find the Border section, and click the Options Icons. Select the sides for which to show the Border.


Width In Percentage
The Grid, Grid Repeater, generally all full-width container elements, and the Text element are always 100% wide. You can see the real 100% in the value field of the Property Panel for the selected element. You can also set the Width value in percent. However, the Height can only be 100 percent.
Change Value With Mouse Move
Many popular graphic and mockup editors can change values with the Mouse Scroll or Move. You can do the same as the parameters and properties illustrated with icons. Go to the Property Panel, hover the mouse over the icon near the property input field and move the mouse right to increase the value and the left to decrease it.
Block Boxed And Wide
You can change the Content Width by selecting the value from the dropdown list for the Block Width. Select a Block, then go to the Property Panel. In the W (Width) property, click the small arrow to open the dropdown list with options. Click the options to change the Content Width from Boxed to Wide.
Lock Elements In Outline
You can lock and unlock the Elements, Containers, or Blocks in the Outline by clicking on the Lock icon on the Element Layer. It makes your design work more convenient especially working with multiple details.
Double-click to edit elements in a Group
Even though you can move and select grouped elements as a single unit, you can edit every one of them — double-click to access a grouped element and edit its properties in the context toolbar or the Property Panel.
Group & Ungroup Elements
The Group Operation creates a Group Element, which allows you to assemble several elements and use them as one piece in the Editor. As a Group, you can do several operations and add actions, including adding Background and moving Elements and applying various animation effects to a Group and its Elements.
Hide Elements In Outline
While working in the Editor, you can hide Elements, Containers, or whole Blocks in the Outline. It is helpful to focus on some details while hiding the overlapping or hindering ones.
Rename Blocks in Outline
To organize and manage Blocks, you can rename them in the Outline. Select the Page Navigator to the left switch to the Outline Tab. Double-click or select the Rename option in the Options. Change the Block Name to make your process of designing a website more manageable and convenient.
Page Options In Editor
Page Options are very important for website building, as this list contains the essential operations for the page. You can enable the Grid Columns, use the copy and paste, import and export page operations, and access the Settings. You can access the Page Options from the Right-click Menu by clicking on the Options icon to the top right of the Editor.

Creating A Website Using Visual Freehand Page Builder
Not long ago, you required experts in WordPress and HTML to build a working website with custom content elements and templates, however, nowadays, there are no coding skills required to create a WordPress website with a responsive design. The modern, flexible visual editor creates a website using a drag and drop interface that provides everything you need to build a unique WordPress theme for your website with the top best WordPress page builder plugins. Inexperienced users will immediately understand that no coding is required when they see the drag and drop page editor for the first time. Users can also exploit the theme builder for creating custom WordPress themes for future usage and promotion. Strict but laconic signed icons will help the user orientate throughout the toolset and speed up the acquaintance with the website structure. Remember, the future landing pages sales will directly depend on the style and content of the user's site.
The first thing users need to do after providing their email address for registration is to imagine what they want to have on their website. They can look through a great amount of landing pages, commercial pages, and entertainment pages layout templates that are provided in the visual page builder to choose the positioning of images, text, and additional features. Clicking the Add Page button will create a starting drop page, where users modify it to their liking with the help of the visual page builder plugin. With the help of the drag & drop editor, the user can drag the layout he liked the most onto the main screen, where the future website page will be displayed. Customize page layouts using WordPress page visual editor to change the size and form of image blocks and text blocks. WordPress page builder also has complete pages to exploit, and most of the page templates come with free WordPress online builder plugins.
Users can use existing or add custom CSS to their text overall color scheme and then edit particular color to the particular text block or its part. Thanks to a free WordPress page builder plugin creating something like contact form plugins is done quickly and effectively with simple drag and drop elements that pick up the contact form template user likes and sets it where he wants it to be. The free WordPress theme is highly important for pages with various custom post types because all the posts will automatically become integrated into the chosen WordPress theme. Users won't need additional settings and constant repeating of the same actions and concentrating on the content. After getting used to the drag and drop builder and better understanding the page builder plugin, the user can gain full control over every aspect of the new visual composer website and use more advanced techniques for his future drop landing page, especially in the case of using a theme website builder to create unique WordPress themes for other users or to create plugins for WordPress themes that theme builder like visual composer provides.