Digital Art Museum WordPress Theme


Edit Template Offline
2. Create new page and search for id 14287
Edit Template Online
Create Awesome Websites


Free Nicepage Builder
Keywords
Editorial Stories and Exhibition Areas Fit a Content-Led Theme
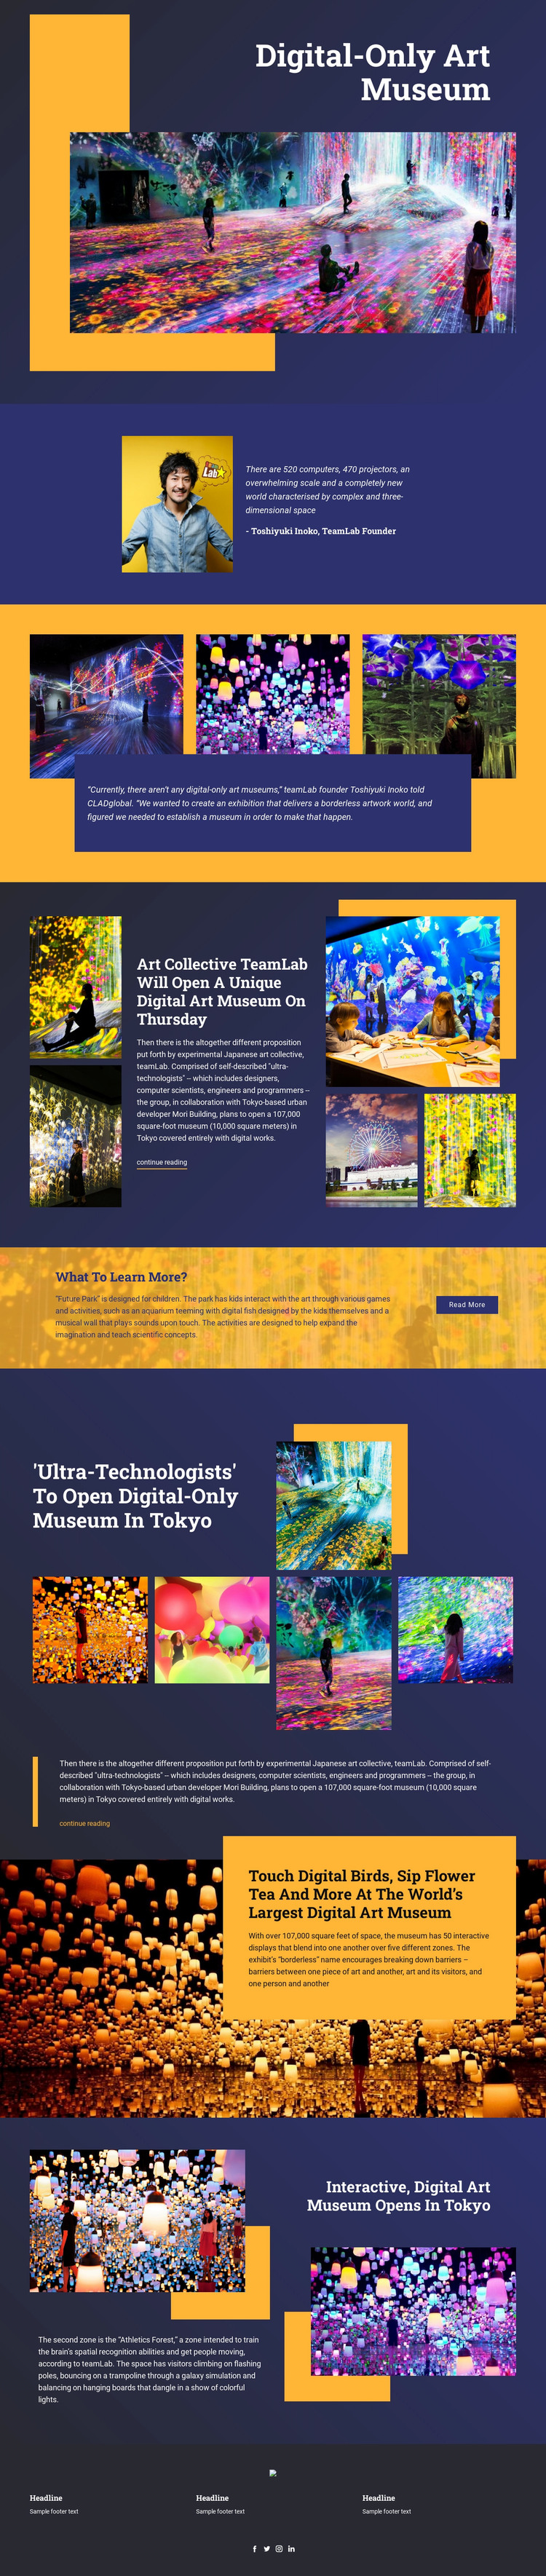
The permanent page areas are clearly separated from the visual material that supports them. The opening museum introduction establishes the main subject, and the portrait-and-quotation section gives the editorial story a named perspective through Toshiyuki Inoko, described as a teamLab founder. The three-artwork gallery and its centered statement can be understood as a visual exhibition area, while the central teamLab article provides a longer page-oriented content block with a continue-reading link.
The remaining sections offer several relationships for a content-led WordPress project. Future Park is specifically described as designed for children, so it can represent an audience-focused museum feature rather than another general exhibition paragraph. The later Tokyo coverage combines an editorial headline, excerpt, featured artwork, and a row of four images, creating a repeatable pattern for stories that need both written context and visual proof. The immersive display section and Athletics Forest description add visitor-experience and zone-related content, with the latter focused on spatial recognition and movement.
The design’s shared visual elements keep those different content areas connected. Large white headlines, compact article copy, dark navy surfaces, golden panels, and vivid artwork imagery establish the theme’s character, while the footer supplies three information columns and Facebook, Twitter, Instagram, and LinkedIn icons. In a WordPress-managed project, this arrangement can support permanent museum information and regularly updated editorial material without presenting unverified posts, categories, or CMS structures as existing parts of the template.
Customize with Nicepage
Open this ready-made template in the WordPress Website Builder and customize it visually in the Nicepage editor. Replace demo content, edit page sections, and adapt the design to your project without rebuilding the template from scratch.
Manage and Edit This Theme in WordPress
Customize and Install the WordPress Theme
Start with this ready-made theme instead of building the WordPress design from scratch. Customize its layout, content, typography, images, sections, and other design elements visually in Nicepage editor, then export and install the WordPress Theme, Plugin, and Pages on your WordPress site. The Nicepage WordPress Plugin lets you continue working with the site after installation.
Edit the Theme Directly in WordPress
After installation, you can edit the WordPress Theme directly in WordPress with the Nicepage WordPress Plugin. Use Site Style to customize site Colors, Fonts, Header, Footer, Blog, and Post Page Templates while working within your WordPress website.
Edit WordPress Pages Visually
Use the Nicepage WordPress Plugin to edit page content directly from the WordPress admin area. Open a WordPress Page with Nicepage and visually change its text, images, sections, and other page elements while continuing to manage the Page through WordPress.
WordPress Content and Theme Integration
Use the customized theme with WordPress Pages, Posts, Blog and Post Templates, menus, widgets, and other CMS-managed content. Shared theme elements such as Colors, Fonts, Header, Footer, Blog, and Post Page Templates can be managed as part of the overall site design, while WordPress provides the CMS environment for managing site content.
This workflow combines a ready-made WordPress Theme with visual customization, direct theme editing in WordPress, and continued content management through the Nicepage WordPress Plugin.