Sport shoes product details Template


Two Product Images Give the Detail Layout a Clear Point of Difference
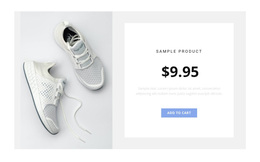
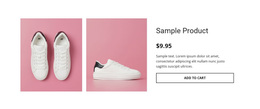
The section combines a two-image presentation with a focused information panel instead of using a simple single-image-and-text arrangement. That choice gives the product visual presence on the left while preserving a compact buying area on the right. The product name, description, previous price, and current price provide the information needed to understand the displayed item, and the outlined Add to Cart button gives the section a visible purchase endpoint.
The design is particularly identifiable through its relationships. Both square photographs share the pink-backed treatment, so they read as one coordinated product display. The white background leaves room around the image pair and panel, while black typography maintains contrast across the heading, prices, and description. The button's broad outlined form reinforces the width of the information column and prevents the action from becoming visually lost beneath the text.
As a ready-made block choice, this option suits a page that needs a single product to receive more attention than a compact catalog card would provide. It offers image variety, a clear price comparison, descriptive space, and a prominent purchase action in one section. The design remains focused and reusable: it can present the product detail role while other blocks handle collection browsing, related items, or wider page content.
Customize with Nicepage
Open this ready-made template in the Template Builder and customize it visually in the Nicepage editor. Replace demo content, edit page sections, and adapt the design to your project without rebuilding the template from scratch.
Edit Template Offline
2. Create a new page or select existing
3. Click Add new block, search for id 115128 and click enter
Edit Template Online
Create Awesome Websites


Free Nicepage Builder
Keywords
Start With a Ready-Made Template
Choose a Design for a New Page
Use a ready-made template as a starting point instead of creating every page from a blank canvas. When adding a new page in Nicepage, browse available designs, compare different layouts, and choose an option that already fits the general purpose and visual direction of your project.
Browse Different Page Designs
Explore Page Designs using search, thematic categories, Design Sets, and full-page previews. The collection includes layouts for different subjects and page purposes, making it easier to compare alternatives before selecting a design to customize.
Customize the Selected Template
After choosing a design, create the page and continue editing it visually in Nicepage. Replace the demo content, adjust images, typography, colors, sections, and other elements, and adapt the ready-made layout to your own content instead of rebuilding the design from the beginning.
Explore More Design Directions
If the first option does not match your project closely enough, return to the design collection and compare other templates before committing to a layout. This makes the template library useful not only for faster page creation, but also for exploring different visual approaches and finding a suitable starting point for a new project.
This workflow gives you access to a broad collection of ready-made designs that can be selected, compared, and customized according to the needs of each new page or project.