Calendar with shape Template


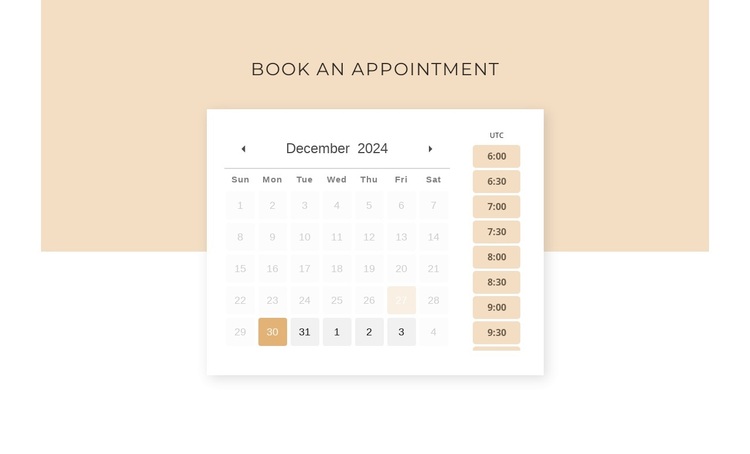
A Focused Date-to-Time Arrangement Sets This Design Apart
The strongest reason to choose this block is the way it concentrates appointment scheduling into a single visual sequence. A large monthly calendar establishes the date context, while a narrow vertical column of rectangular time controls turns that context into a specific appointment choice. The “Book an appointment” heading makes the function immediately legible, and the centered white card gives the section more presence than an isolated calendar control would have.
The design also handles the visual difference between a selected date and the rest of the month through a highlighted state and warm accent controls. Unavailable slots, successful booking, conflicts, and errors provide structural evidence of the different feedback moments the interface needs to communicate. These details make the block useful when a page needs a scheduling section that feels deliberate and complete in its own visual area.
Compared with a broader service-information arrangement, this option gives priority to the booking task itself. The pale background panel and subtle shadow create calm separation, while the neutral palette avoids overwhelming the calendar and time choices. It is a suitable section choice when the surrounding page already explains the service and needs one clearly defined area where visitors can move from selecting a date to selecting an appointment time.
Customize with Nicepage
Open this ready-made template in the Template Builder and customize it visually in the Nicepage editor. Replace demo content, edit page sections, and adapt the design to your project without rebuilding the template from scratch.
Edit Template Offline
2. Create a new page or select existing
3. Click Add new block, search for id 6415870 and click enter
Edit Template Online
Create Awesome Websites


Free Nicepage Builder
Keywords
Start With a Ready-Made Template
Choose a Design for a New Page
Use a ready-made template as a starting point instead of creating every page from a blank canvas. When adding a new page in Nicepage, browse available designs, compare different layouts, and choose an option that already fits the general purpose and visual direction of your project.
Browse Different Page Designs
Explore Page Designs using search, thematic categories, Design Sets, and full-page previews. The collection includes layouts for different subjects and page purposes, making it easier to compare alternatives before selecting a design to customize.
Customize the Selected Template
After choosing a design, create the page and continue editing it visually in Nicepage. Replace the demo content, adjust images, typography, colors, sections, and other elements, and adapt the ready-made layout to your own content instead of rebuilding the design from the beginning.
Explore More Design Directions
If the first option does not match your project closely enough, return to the design collection and compare other templates before committing to a layout. This makes the template library useful not only for faster page creation, but also for exploring different visual approaches and finding a suitable starting point for a new project.
This workflow gives you access to a broad collection of ready-made designs that can be selected, compared, and customized according to the needs of each new page or project.