To build an E-Commerce website with Nicepage, you should install WordPress on your hosting, the WooCommerce plugin, and import the exported Nicepage Theme with E-Commerce Products to your WordPress website.
Install WooCommerce
To install the WooCommerce plugin, follow these steps.
- Go to your WordPress Admin.
- Open the Plugins section by clicking the link on the Side Menu.
- Click the Add New button.
- Enter "WooCommerce" into the Search field.
- Click the Install Now button.
- After the installation is complete, click the Activate button.
Manage Products
You have two options for editing products.
- You can manage Products in the Products Panel in Nicepage and then import your changes to WordPress.
- You can also do that in the Products section of your WordPress admin in WordPress Admin -> Products.

Design Product Page Templates
The Product Page Templates are part of a WordPress theme and are used to output Products on your WordPress website.
- Open the Nicepage Application.
- Open your Project.
- Go to the Templates Panel on Quick Access.
- Click the Product List Template and edit it in the Editor.
- Edit other product templates as needed.

Export E-Commerce Theme
Click Publish to export the Theme with the Product Templates.
IMPORTANT!
- Check the "Include E-Commerce Templates" checkbox in the dialog to export the Product Templates.
- If you have Products in the Nicepage Project, check the "Include E-Commerce Products" checkbox.

Install E-Commerce Theme
Install the Nicepage Theme on your WordPress website.
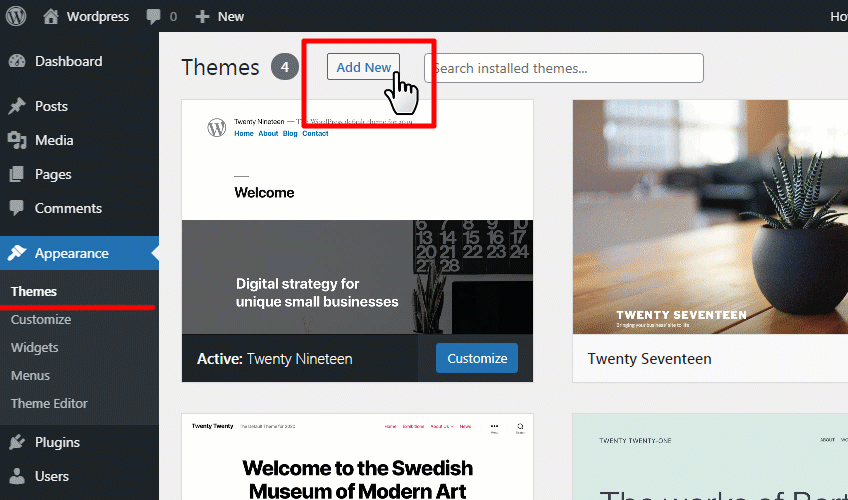
- Open the WordPress Admin.
- Click Appearance ** -> **Themes.
- Click "Add New".
- Click "Upload Theme."
- Choose the Nicepage Theme file.
- Click "Install Now."
- Activate the Nicepage Theme.
- Install the Nicepage Plugin and content with the Wizard if needed.
Add Products To Menu
Manage the Site Menu by adding the link to your Online Store.
- Go to Appearance -> Menus.
- Go to Pages.
- Select "View All".
- Locate the "Shop" item.
- Click "Add to Menu."
- Click "Save."

Set Home Page
Set your site to display the Home page as the main page for your website in Settings> Reading.

Import Products From Theme
You can import Products from the Theme. If you have products in the Theme, you can choose the import source as Theme in the Wizard.
If you select the "Use all from the Plugin" option, the Product Templates from the Theme will display Products from the Plugin.

View E-Commerce Website
Preview your site's main page by clicking the link to the WordPress -> Visit Site or Visit Store.

Related Articles
You can also read about the following: