You can accept payments via PayPal on your websites created with Nicepage. You need a PayPal account to get the PayPal Client ID, which you assign to Payments.
   PayPal API Environments

   PayPal provides two separate environments for API credentials:

   • Sandbox Mode
     Used only for testing and development. No real payments are processed.
   • Live Mode
      Used in production to accept real payments from customers.

   Important Notes

  1. Sandbox credentials cannot be used to process real payments.
      A Sandbox Client ID works only in the Sandbox environment.
  2. A separate Client ID is required for Live Mode.
      To accept real payments, you must create a new Client ID in the Live environment.
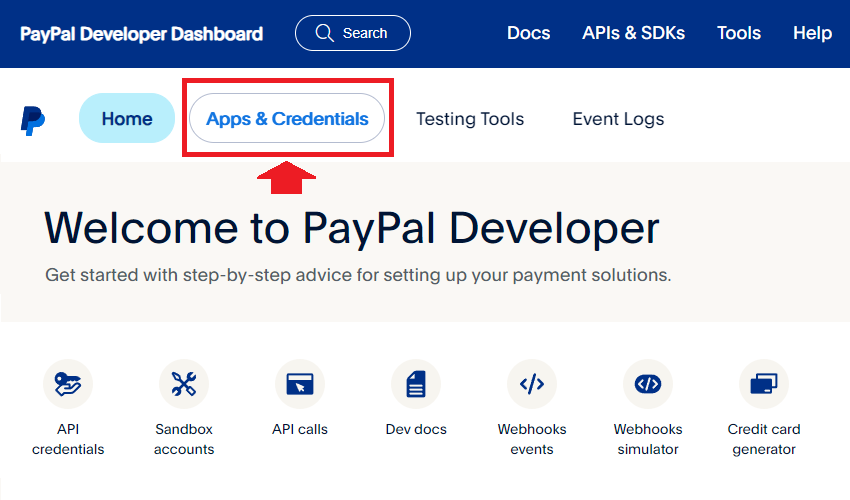
PayPal Developer Home
Open the PayPal Developer Home and click Apps & Credentials in the menu.
Create a New Application
On the Apps & Credentials page, you can always find your added Applications in the REST API Apps table.
   1. At the top of the page, use the Sandbox / Live switch to select the Client ID type.
   2. Click Create App.
   3. Enter your Application Name.
   4. Click Create.

PayPal will then generate your application credentials.

Application Name
In the dialog, enter "Nicepage" into the Name field and click the "Create App" button.

Checkout Order Approved
Scroll down the API Credentials page. Then click the Add Webhook button.

In the dialog, enter the following URL in the field. Then check the Checkout Order Approved box in the Checkout section.
https://service.nicepagesrv.com/paypal/v1/paypal-webhook

Scroll down the dialog, and click the Save button.

You will see the success message and the URL in the table if you enter the correct information.

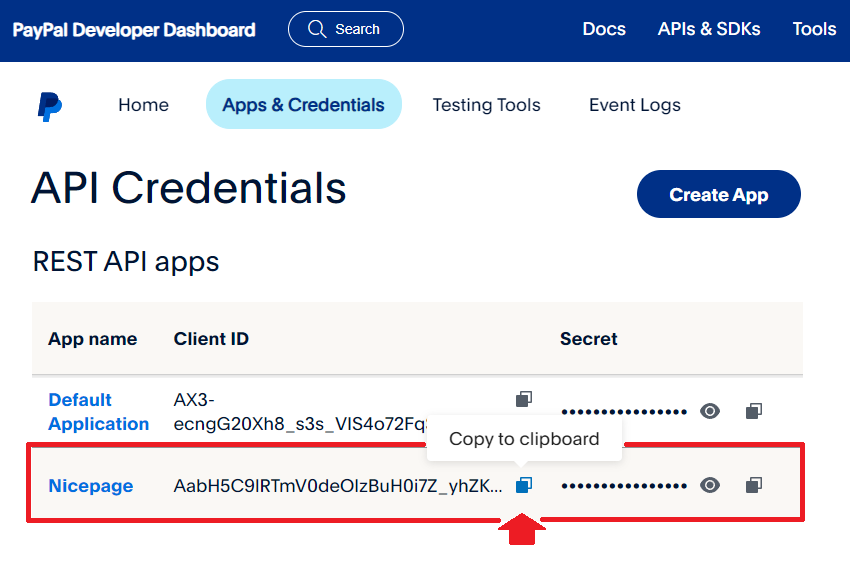
Copy PayPal Client ID
Click Back to return to the API Credentials page. Click the Copy icon in the Nicepage row of the REST API apps table to copy the Client ID.
Assign PayPal Client ID
Please do the following to assign the Client ID to the Payment Button Element.
- Run the Nicepage Application or open the Online Editor.
- Add or select the Payment Button.
- Click the Payments link to open the properties.
- Paste the copied Client ID from the PauPal to the field.
