Need First-Class Template


A Support Section With Context and Response Together
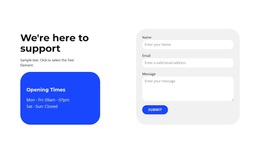
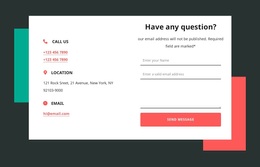
The strongest reason to choose this block is the way it places support context beside a complete inquiry area. The left column does more than introduce the section: it includes the “Opening Times” panel with Mon–Fri: 09am–07pm and Sat–Sun: Closed, giving visitors useful availability information before they respond. The right column keeps the name, email, and message fields together inside a large rounded container and ends with a clear Submit action.
This combination provides more coverage than a contact section built from an isolated form or a long paragraph. The layout also creates a clear visual contrast: bold black text and open white space establish the base, the blue panel and button provide focal accents, and the light-gray form container separates interaction from explanation. Choose this design when a page needs to communicate when support is available while also inviting a focused inquiry. Its balanced left-right alignment keeps the practical schedule visible without making the form feel secondary. The rounded surfaces and pill-shaped fields add a consistent visual motif that distinguishes the section from a plain two-column text layout. The result is a ready-made contact design that combines expectation-setting with direct response in a single, easy-to-place block.
Customize with Nicepage
Open this ready-made template in the Template Builder and customize it visually in the Nicepage editor. Replace demo content, edit page sections, and adapt the design to your project without rebuilding the template from scratch.
Edit Template Offline
2. Create a new page or select existing
3. Click Add new block, search for id 4974531 and click enter
Edit Template Online
Create Awesome Websites


Free Nicepage Builder
Keywords
Start With a Ready-Made Template
Choose a Design for a New Page
Use a ready-made template as a starting point instead of creating every page from a blank canvas. When adding a new page in Nicepage, browse available designs, compare different layouts, and choose an option that already fits the general purpose and visual direction of your project.
Browse Different Page Designs
Explore Page Designs using search, thematic categories, Design Sets, and full-page previews. The collection includes layouts for different subjects and page purposes, making it easier to compare alternatives before selecting a design to customize.
Customize the Selected Template
After choosing a design, create the page and continue editing it visually in Nicepage. Replace the demo content, adjust images, typography, colors, sections, and other elements, and adapt the ready-made layout to your own content instead of rebuilding the design from the beginning.
Explore More Design Directions
If the first option does not match your project closely enough, return to the design collection and compare other templates before committing to a layout. This makes the template library useful not only for faster page creation, but also for exploring different visual approaches and finding a suitable starting point for a new project.
This workflow gives you access to a broad collection of ready-made designs that can be selected, compared, and customized according to the needs of each new page or project.