Contacts and social icons Html Code Example


Contact Regions That Leave Room for Targeted Extensions
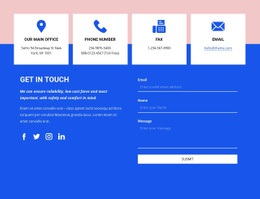
The purple contact-information panel and the light form panel create two clearly bounded areas for any project-specific extension. On the left, the “Get in Touch” heading introduces three repeated contact items and five social media links. On the right, “Level up your brand” leads into name, email, phone, and message inputs, ending with one submission control. Because these regions already have distinct purposes, a custom HTML element could be placed near the relevant content without confusing contact references with inquiry data.
A project might use the contact side for an additional map, availability display, or organization-specific contact channel, provided that addition supports the existing communication role. The form side could accommodate a specialized field, scheduling interface, or external data component when the inquiry process requires more than the current inputs. Such an extension would build around the block’s real content zones rather than replacing its two-column relationship.
The visual separation also helps guide placement. Custom content near the purple panel should remain compatible with white headings, icons, and the stacked contact rhythm, while additions near the form should fit the light surface, pale gray controls, rounded corners, and yellow submission accent. This makes the section a practical base for targeted functionality while keeping its established contact message and response path intact.
Customize with Nicepage
Open this ready-made template in the HTML Code Generator and customize it visually in the Nicepage editor. Replace demo content, edit page sections, and adapt the design to your project without rebuilding the template from scratch.
Edit Template Offline
2. Create a new page or select existing
3. Click Add new block, search for id 2919482 and click enter
Edit Template Online
Create Awesome Websites


Free Nicepage Builder
Keywords
Extend This Page With Custom HTML Code
Insert Code With the HTML Element
Use the HTML Element to add custom code directly to a Block in the Nicepage editor. Enter the required markup in the Code field when the page needs content or functionality that is not available through the standard page elements.
Place the HTML Element in the Layout
Treat the HTML Element as part of the visual page composition. Adjust its position, width, height, alignment, and margins to place the custom content where it belongs alongside text, images, buttons, and other elements. This makes it possible to combine visually edited sections with project-specific code without separating the custom element from the rest of the layout.
Add HTML, CSS, JavaScript, and External Components
The HTML Element supports HTML, CSS, and JavaScript, allowing you to extend the page with custom markup and interactive functionality. It can also be used to embed custom code and third-party components, such as social feeds, advertising code, widgets, or other external functionality required by the project.
This workflow makes the template useful for projects that need a visual page editor together with custom HTML code, JavaScript, embedded components, and functionality beyond the standard page elements.