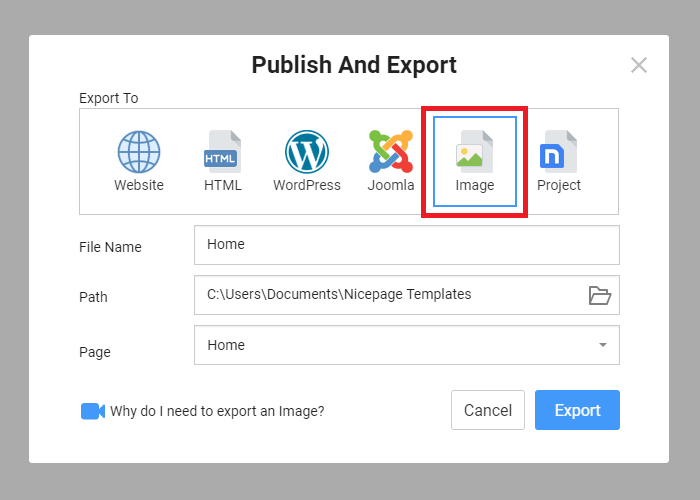
In Nicepage, you can export your Web Page as an Image to share it with your customers, and colleagues or use it in the portfolio.
NOTE: This Export Option is available with the Nicepage Starter Edition for free.
Export Page Image
Please do the following to export a Project Page as an Image.
- Run the Nicepage Application or Online Editor.
- Open your working Website.
- Click on the Publish and Export link on the Top Bar.
- Select the Image Tab.
- Specify the File Name, Path, and Page.
- Click the Export button.
NOTE: The Export as Image option is unavailable for the Templates and Blog Posts.
Page Image Sample
The following example shows you the generated Image of a web page screenshot.
In Nicepage, you can export your Web Page as an Image to share it with your customers, and colleagues or use it in the portfolio. NOTE: This Export Option is available with the **Nicepage Starter Edition** for free. !image-export.png! ## Export Page Image Please do the following to export a Project Page as an Image. 1. Run the Nicepage **Application** or **Online Editor**. 2. Open your working **Website**. 3. Click on the **Publish and Export** link on the Top Bar. 4. Select the **Image** Tab. 5. Specify the File **Name**, **Path**, and **Page**. 6. Click the **Export** button. NOTE: The Export as Image option is unavailable for the **Templates** and *Blog Posts*. ## Page Image Sample The following example shows you the generated Image of a web page screenshot. !image-screenshot.jpg! ##