You can publish sites created with the Desktop Apps and Online Editor to the Nicepage Hosting. Click the Publish button to open the Publish And Export dialog. The "Nicepage Hosting" option is the default.
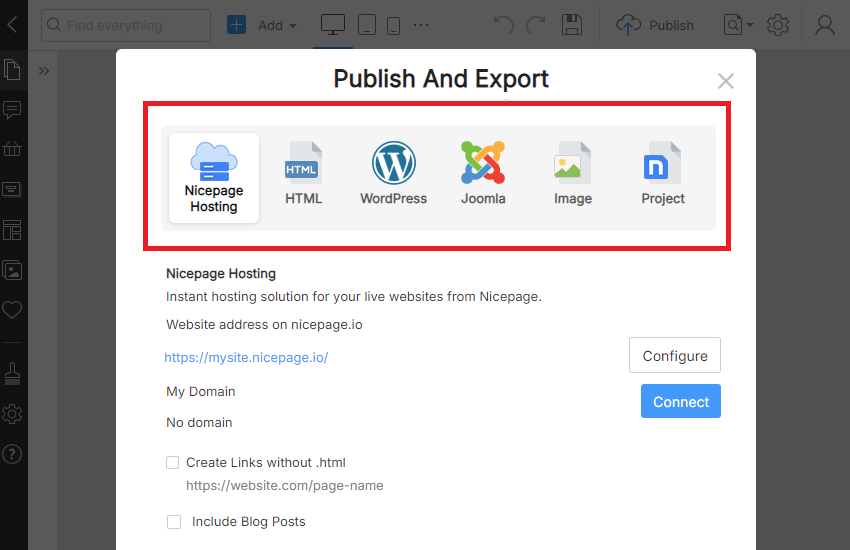
export-dialog.png

Custom Domain

You can assign a Custom Domain for the published websites.

custom-domain.png

Custom Domain Verification

Before publishing, you can also check the custom domain assignment in the Publish and Export dialog. The following is an example of an error message.

check-domain-publish-failure.png

You can also verify the connection to your custom domain in the Publish Success dialog. If your domain check is successful, you will see the success message.

check-domain-publish-success.png

Email Verification

If your Email for the Contact Form Submission is not verified, and you click the Publish Website button, you will see the dialog offering you to send the confirmation email to get your Contact Form working.

verify-email-publishing.png

Published Sites On Dashboard

After the site publication, you will see the Icon, Text, and Time on its Site Thumbnail on the Application Dashboard.

published-site-dashboard.png

Unpublish Sites

After publishing, links in the Publish And Export dialog allow you to unpublish your Website. You can also edit the domain and subdomain using the Desktop Applications.

edit-domain-unpublish-site.gif

Optimized Publish

While publishing a website, you export changes made only for a Page or the Site Properties instead of the Project. The process is notably faster than the second publishing, where only the differences are uploaded.

From Nicepage 4.12, the Website Publishing mechanism is optimized for all projects. This makes the publishing of large projects more stable. If the connection breaks, the publishing restarts from the last breaking point.

Publish Tooltip Arrow

The Arrow and Tooltip remind you about the unpublished changes.
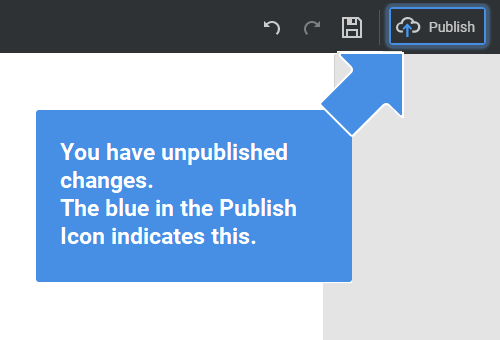
publish-arrow.png

You can publish sites created with the Desktop Apps and Online Editor to the Nicepage Hosting. Click the Publish button to open the Publish And Export dialog. The "Nicepage Hosting" option is the default. !export-dialog.png! ## Custom Domain You can assign a [Custom Domain](page:1293) for the published websites. !custom-domain.png! ## Custom Domain Verification Before publishing, you can also check the custom domain assignment in the **Publish and Export** dialog. The following is an example of an error message. !check-domain-publish-failure.png! You can also verify the connection to your custom domain in the **Publish Success** dialog. If your domain check is successful, you will see the success message. !check-domain-publish-success.png! ## Email Verification If your Email for the Contact Form Submission is not verified, and you click the Publish Website button, you will see the dialog offering you to send the confirmation email to get your Contact Form working. !verify-email-publishing.png! ## Published Sites On Dashboard After the site publication, you will see the Icon, Text, and Time on its **Site Thumbnail** on the **Application Dashboard**. !published-site-dashboard.png! ## Unpublish Sites After publishing, links in the **Publish And Export** dialog allow you to unpublish your Website. You can also edit the domain and subdomain using the Desktop Applications. !edit-domain-unpublish-site.gif! ## Optimized Publish While publishing a website, you **export changes** made only for a Page or the Site Properties instead of the Project. The process is notably faster than the second publishing, where only the differences are uploaded. From [Nicepage 4.12](page:271235), the Website Publishing mechanism is optimized for all projects. This makes the publishing of large projects more stable. If the connection breaks, the publishing restarts from the last breaking point. ## Publish Tooltip Arrow The Arrow and Tooltip remind you about the unpublished changes. !publish-arrow.png! ##