Creator ad other pricing plans Template


A Three-Tier Comparison With Strong Visual Separation
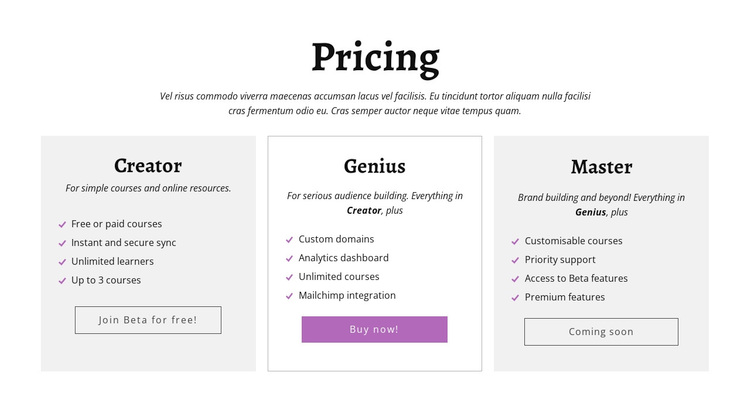
The section combines several concrete reasons to choose it over a simpler pricing layout. Its centered introduction establishes context without competing with the cards, while the three-column row keeps Creator, Genius, and Master visible as peer options. Each plan has enough internal content to communicate a distinct level of course-platform capability rather than relying only on a price label.
The comparison also gains clarity from its repeated structure. Creator lists free or paid courses, secure sync, unlimited learners, and up to three courses. Genius emphasizes custom domains, analytics, unlimited courses, and Mailchimp integration. Master adds customisable courses, priority support, beta features, and premium features. The separate actions—Join Beta for free!, Buy now!, and Coming soon—make the cards useful for different response states.
Visually, the white middle card with a thin border contrasts with the light-gray outer cards, creating a subtle focal point without breaking the row. Black serif typography and muted purple buttons keep the treatment restrained while checkmarked feature rows support scanning. This is a ready-made section choice for a page that needs concentrated plan comparison, clear progression, and more visual distinction than a flat list of offers.
Customize with Nicepage
Open this ready-made template in the Template Builder and customize it visually in the Nicepage editor. Replace demo content, edit page sections, and adapt the design to your project without rebuilding the template from scratch.
Edit Template Offline
2. Create a new page or select existing
3. Click Add new block, search for id 439256 and click enter
Edit Template Online
Create Awesome Websites


Free Nicepage Builder
Keywords
Start With a Ready-Made Template
Choose a Design for a New Page
Use a ready-made template as a starting point instead of creating every page from a blank canvas. When adding a new page in Nicepage, browse available designs, compare different layouts, and choose an option that already fits the general purpose and visual direction of your project.
Browse Different Page Designs
Explore Page Designs using search, thematic categories, Design Sets, and full-page previews. The collection includes layouts for different subjects and page purposes, making it easier to compare alternatives before selecting a design to customize.
Customize the Selected Template
After choosing a design, create the page and continue editing it visually in Nicepage. Replace the demo content, adjust images, typography, colors, sections, and other elements, and adapt the ready-made layout to your own content instead of rebuilding the design from the beginning.
Explore More Design Directions
If the first option does not match your project closely enough, return to the design collection and compare other templates before committing to a layout. This makes the template library useful not only for faster page creation, but also for exploring different visual approaches and finding a suitable starting point for a new project.
This workflow gives you access to a broad collection of ready-made designs that can be selected, compared, and customized according to the needs of each new page or project.