We are continuing to present you our amazing web design tool, Nicepage. In this presentation we will use the Desktop version to show you how to export and to install the Nicepage Template and the Content in Joomla.
The following video tutorial was made with one of the previous versions. We are updating the videos.
Install Nicepage
** Nicepage Editions **. There are many web design tools, but none are simple, easy-to-use, and allow creating websites in minutes. Nicepage Joomla Template Builder is available online as a Desktop Application for Windows and Mac and as a Plugin for WordPress and Joomla.
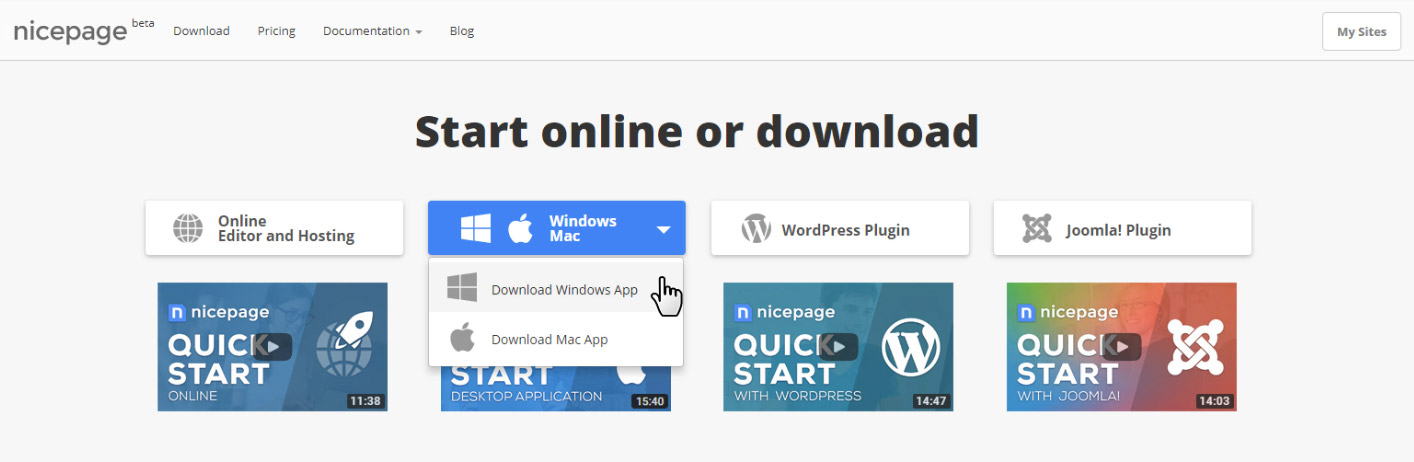
Download Nicepage. We will start by visiting the Nicepage website at nicepage.com. On the home page, enter a valid email address. Click the “Getting Started” button. On the download page, get the Windows Application. Install the application. Nicepage will start automatically. Activate or continue the Trial.
Run Nicepage. In Nicepage, start by creating a New Website. Optionally, enter the Website Name. You can create pages from scratch or build using the Powerful Page Builder. Using Nicepage is simple, similar to working in Microsoft PowerPoint or Apple Keynote.
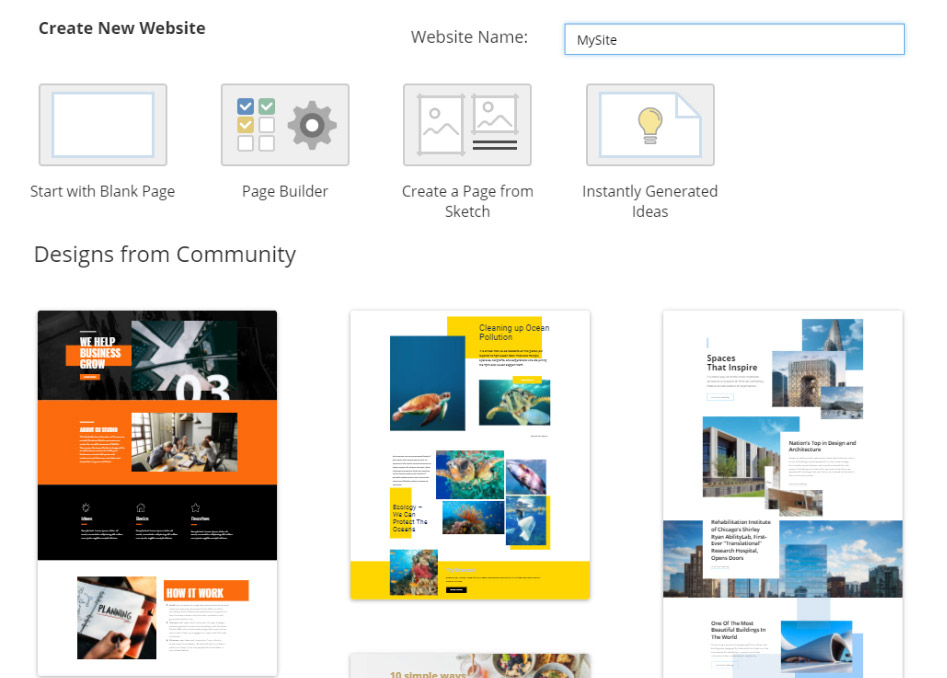
Use a Pre-made Template. To illustrate the installation process, we will use one of the pre-designed examples the Nicepage Designer Community provided. You can start with any of these samples. Let’s start with this one.
Export Options
After you create a website, Nicepage automatically opens the first page for editing. Let’s rename this page to Home. Please note that there are three Export Options available for Joomla and WordPress.

Exporting Joomla Template. Firstly, you can export only the Nicepage Template without content.
Exporting Joomla Content. Secondly, you can export only the Content created in Nicepage, which will also include the Nicepage Plugin for Joomla. Please note that this option doesn’t include the Template. It may be used if the Nicepage Template has already been installed.
Exporting Joomla Template and Content. Finally, the third option exports both the Template and the Content. We will start with this one since it is the most commonly used combination.
Install Joomla Template, Articles, and Extension
Install Joomla Template. We have prepared three zips for the installation. Switch to your Joomla Admin. We start with the Template installation. In the top menu, select Extensions -> Manage -> Install.

Upload Joomla Package. On the Install page the "Upload Package File" tab is selected by default.
You can drag and drop the Template plus Content zip into the dashed area or click the "Or browse for file" button to select the zip from a folder on your PC. The installation starts automatically.

Assign Joomla Package. After the installation is complete, go to Extensions -> Templates**. Find your template in the list and make it the default.
Install Joomla Content. Next, we will install the Content. Open the folder with the zips. Unzip the zip with the Template plus Content. Open the Extensions folder. There is a nicepage.zip file containing the content created in Nicepage. Go back to your Joomla Admin. Open Extensions -> Manage -> Install. Drag and drop the nicapage.zip from the Extensions folder or click the "Or browse for file" and select this file. It’s similar to the template installation that was done before.

Assign Joomla Template. Go to Joomla Extensions -> Templates. Locate and click your installed Template. On the template page, click the “Import Content from Template” button.
Add a New Menu Item
Now, to show the installed page on your Joomla site, we need to add this page to the menu.

Work With Menu In Joomla. Go to Joomla Top Bar -> Menus -> Main Menu -> New Menu Item. On the New Item page enter your Menu Item Title, in our case, enter “Home”. Click the Select button for the Menu Item Type field. Select Single Article in the dialog. Click the “Select” button for the Select Article field, and select your page from the Page List. Move the menu item up by dragging the row in the list.
Adding a Position for the Menu
Previewing the Site. Click the site preview to the right in the Joomla Admin. Your Joomla does not have a menu position set. Nicepage generates a position for the menu used to output it in the template. You need to connect the menu with a position.

Assigning Joomla Position. To set a position for the menu, go to Extensions -> Modules. Click New to add the new Menu Module. Select Menu in the “Select a Module Type” Dialog. Enter your Menu Title. Select Menu. To the right, there is a Position drop-down list. Locate the “hmenu” position under the installed Template name. Click the “Save and Close” button. Click the site preview link to the top right of the Joomla Admin. Now you see that your website has a menu.
Installing Joomla Template
Now, we will cover the other two options. We will install the Nicepage Template for Joomla without Content.
Uploading Joomla Zip. Switch to the Joomla Admin. In the Top Bar select Extensions -> Manage -> Install. On the Install page, drag and drop the Template zip into the dashed area, or click the "Or browse for file" button to select the zip from a folder on your PC.
Assign Joomla Template. After the installation, go to Extensions -> Templates. Locate your template and make it the default.
Installing Joomla Content
Now, let’s install the Content. In the Top Bar, select Extensions -> Manage -> Install.
Importing the Content. On the Install page, drag and drop the Content zip into the dashed area, or click the "Or browse for file" button to select the zip from a folder on your PC. Note that the new Nicepage Item has appeared on the Joomla Top Bar. Open Nicepage Menu. Select the “Import Data” Item. On the “Import Data” page, click the “Choose Files” button to import (.zip). Select the Content zip once again. And Click the “Import” button. Similarly to what we did before, let’s add a menu item for the newly installed content page.

Adding a New Menu Item. Go to Joomla Top Bar -> Menus -> Main Menu -> New Menu Item. On the New Item page enter your Menu Item Title, in our case, enter the Home Title. Select the Menu Item Type. Select the Single Article. Select the Article. Make it default. Move the menu item up by dragging the row in the list.

Working with Joomla Articles. To ensure that the Content has been imported, open the Article List and select Content -> Articles. Click your page in the Page List. You will see that the Nicepage Plugin has been installed, as there is the “Edit with Nicepage” button. Also note that the Nicepage Template is used for this page. To preview the page, click the link at the top right of Joomla Admin.
We hope you have enjoyed this Nicepage for the Joomla installation demo.