Creative popup Html Code Example


The Illustration and CTA Create Clear Extension Regions
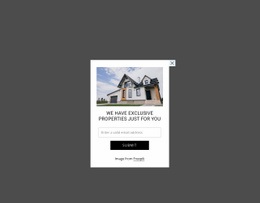
The modal already separates its visual and messaging responsibilities. The illustrated character fills the left portion of the centered purple card, while the eyebrow, heading, supporting paragraph, and “Create your Popup” button form a stacked content region on the right. The close control is placed independently in the upper-right area, and the “Image from Freepik” line occupies a supporting attribution role. These boundaries make the block understandable before any additional functionality is considered.
For an HTML Code use case, a project could place a custom element near the right-hand action area if the popup needs functionality beyond the existing static content. For example, a project-specific service could require an embedded signup step, a data-driven status message, or an external widget associated with popup creation. Any such addition should fit beside the established CTA hierarchy rather than displacing the heading or turning the illustration into a separate interface. The darkened backdrop and rounded card should continue to define the visual limits of the section.
The existing close control also identifies a practical integration relationship: custom behavior may need to respect how visitors leave the modal, while the “Create your Popup” action remains the visible response point. The block therefore offers a focused base for optional extension, with the illustration, promotional copy, attribution, and primary action still carrying the section’s original purpose.
Customize with Nicepage
Open this ready-made template in the HTML Code Generator and customize it visually in the Nicepage editor. Replace demo content, edit page sections, and adapt the design to your project without rebuilding the template from scratch.
Edit Template Offline
2. Create a new page or select existing
3. Click Add new block, search for id 6548914 and click enter
Edit Template Online
Create Awesome Websites


Free Nicepage Builder
Keywords
Extend This Page With Custom HTML Code
Insert Code With the HTML Element
Use the HTML Element to add custom code directly to a Block in the Nicepage editor. Enter the required markup in the Code field when the page needs content or functionality that is not available through the standard page elements.
Place the HTML Element in the Layout
Treat the HTML Element as part of the visual page composition. Adjust its position, width, height, alignment, and margins to place the custom content where it belongs alongside text, images, buttons, and other elements. This makes it possible to combine visually edited sections with project-specific code without separating the custom element from the rest of the layout.
Add HTML, CSS, JavaScript, and External Components
The HTML Element supports HTML, CSS, and JavaScript, allowing you to extend the page with custom markup and interactive functionality. It can also be used to embed custom code and third-party components, such as social feeds, advertising code, widgets, or other external functionality required by the project.
This workflow makes the template useful for projects that need a visual page editor together with custom HTML code, JavaScript, embedded components, and functionality beyond the standard page elements.




















More from Education Blocks
-

-

-
-
-
-
-
-
-
-
-
Customize Any TemplateDownload
-
-
-
-
-
-
-
-
-
-



















More from Modal Popup Blocks
-

-
-
-
-
-
-
-
-
-
-
Customize Any TemplateDownload
-
-
-
-
-
-
-
-
-
-