Choose your personal rate Html Code Example


Three Comparable Cards Define Clear Extension Areas
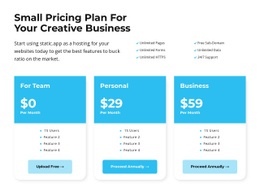
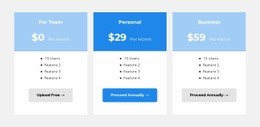
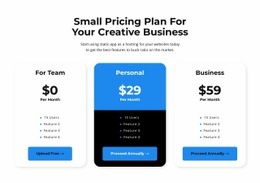
The heading and supporting paragraph already establish the purpose of the section before the plan row begins. Inside that row, the For Team, Personal, and Business cards use the same basic information sequence: plan name, monthly billing label, prominent price, four feature lines, and an action button. This repeated structure creates bounded content regions that can be extended if a project later requires additional data, a custom comparison element, or an external pricing-related component.
Custom code should complement those regions rather than replace the existing comparison logic. A project-specific label, availability indicator, billing explanation, or connected action could be positioned near the relevant card content while keeping each plan visually self-contained. The white background and three-column arrangement also make the boundaries between cards easy to identify when deciding where an added element belongs. The central card's black body and blue upper panel should remain part of that decision, since an extension placed there may carry more visual emphasis than the same addition on either side card. In an HTML Code context, the value lies in preserving the verified plan hierarchy while creating a logical place for optional functionality around the feature lists or actions. The section remains a pricing block, not a complete purchasing workflow.
Customize with Nicepage
Open this ready-made template in the HTML Code Generator and customize it visually in the Nicepage editor. Replace demo content, edit page sections, and adapt the design to your project without rebuilding the template from scratch.
Edit Template Offline
2. Create a new page or select existing
3. Click Add new block, search for id 2332397 and click enter
Edit Template Online
Create Awesome Websites


Free Nicepage Builder
Keywords
Extend This Page With Custom HTML Code
Insert Code With the HTML Element
Use the HTML Element to add custom code directly to a Block in the Nicepage editor. Enter the required markup in the Code field when the page needs content or functionality that is not available through the standard page elements.
Place the HTML Element in the Layout
Treat the HTML Element as part of the visual page composition. Adjust its position, width, height, alignment, and margins to place the custom content where it belongs alongside text, images, buttons, and other elements. This makes it possible to combine visually edited sections with project-specific code without separating the custom element from the rest of the layout.
Add HTML, CSS, JavaScript, and External Components
The HTML Element supports HTML, CSS, and JavaScript, allowing you to extend the page with custom markup and interactive functionality. It can also be used to embed custom code and third-party components, such as social feeds, advertising code, widgets, or other external functionality required by the project.
This workflow makes the template useful for projects that need a visual page editor together with custom HTML code, JavaScript, embedded components, and functionality beyond the standard page elements.

Design Set (16)























More from Business & Law Blocks
-
-

-
-
-
-
-
-
-
-
-
Customize Any TemplateDownload
-
-
-
-
-
-
-
-
-
-













More from Pricing Blocks
-
-
-
-
-
-
-
-
-
-
-
Customize Any TemplateDownload
-
-
-
-
-
-
-
-
-
-