Windows Defender may prevent Nicepage from writing into the /Documents folder where Nicepage Desktop stores all websites. This article explains how to turn off Windows Defender, both temporarily and permanently, in Windows 10.
Windows Defender can be disabled temporarily until you restart your computer from within Settings. Or you can prevent Windows Defender from turning itself back on until you allow it from within the Windows Registry Editor. The second option should solve the issue with Nicepage Desktop permanently.
Open Start Menu
![start.png]()
Open Settings (a gear-shaped Settings icon)
![settings.png]()
Click "Update & Security."
![update.png]()
Click "Windows Security."
![win-security.png]()
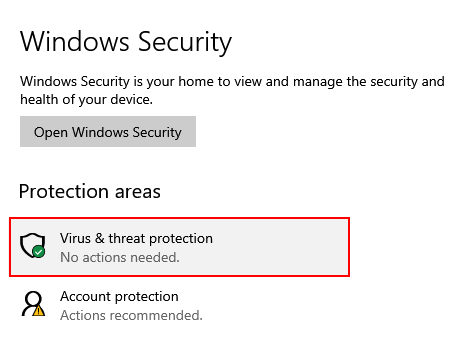
Click "Virus & threat protection."
![virus-protection.png]()
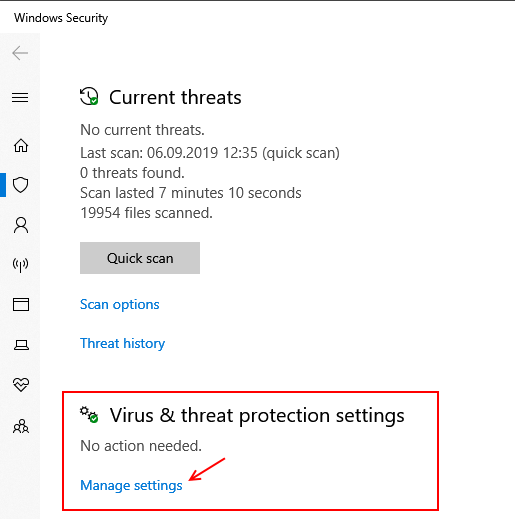
Click "Virus & threat protection settings."
![propection-settings.png]()
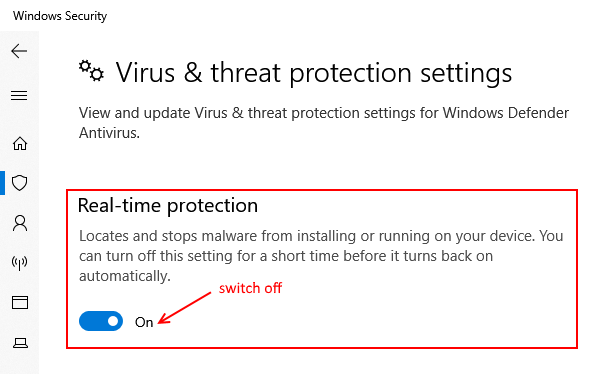
Disable Windows Defender's real-time scanning. Switch the "Real-time protection" option OFF
![disable-real-time.png]()
Restart Nicepage.
If the issue continues, please Contact Support


