We create online shops Html Code Example


The Text-and-Image Split Leaves a Clear Extension Boundary
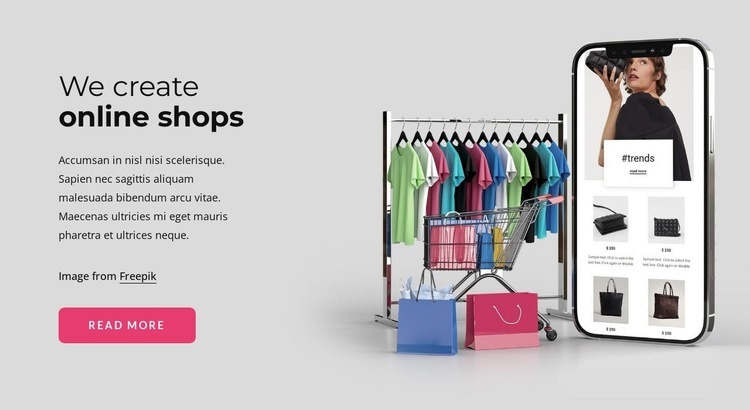
The left side already establishes the block’s central message through the “We create online shops” heading, one supporting paragraph, and the “read more” button. Together, these elements create a bounded introduction rather than a dense product catalogue or checkout area. The right side is a separate visual region containing one large retail image with clothing racks, shopping bags, a cart, and a smartphone storefront. This separation makes the existing content relationships easy to preserve if a project later needs an additional element.
For an HTML Code use case, a custom extension could be considered near the relevant content region rather than treated as the block’s existing functionality. For example, a project might place an external shop preview, product-data widget, or other retail-specific integration alongside the introductory content if that requirement is added later. The extension would need to respect the left-to-right balance and the button’s role as the visible next step.
The image credit line naming Freepik also belongs to the section’s content arrangement and should remain distinct from any added code region. The block therefore offers practical boundaries for optional markup: message and action on the left, supporting retail imagery on the right, and attribution within the existing composition. Its current interaction remains static; custom behavior should be treated as a project-level addition, not as something already contained here.
Customize with Nicepage
Open this ready-made template in the HTML Code Generator and customize it visually in the Nicepage editor. Replace demo content, edit page sections, and adapt the design to your project without rebuilding the template from scratch.
Edit Template Offline
2. Create a new page or select existing
3. Click Add new block, search for id 529402 and click enter
Edit Template Online
Create Awesome Websites


Free Nicepage Builder
Keywords
Extend This Page With Custom HTML Code
Insert Code With the HTML Element
Use the HTML Element to add custom code directly to a Block in the Nicepage editor. Enter the required markup in the Code field when the page needs content or functionality that is not available through the standard page elements.
Place the HTML Element in the Layout
Treat the HTML Element as part of the visual page composition. Adjust its position, width, height, alignment, and margins to place the custom content where it belongs alongside text, images, buttons, and other elements. This makes it possible to combine visually edited sections with project-specific code without separating the custom element from the rest of the layout.
Add HTML, CSS, JavaScript, and External Components
The HTML Element supports HTML, CSS, and JavaScript, allowing you to extend the page with custom markup and interactive functionality. It can also be used to embed custom code and third-party components, such as social feeds, advertising code, widgets, or other external functionality required by the project.
This workflow makes the template useful for projects that need a visual page editor together with custom HTML code, JavaScript, embedded components, and functionality beyond the standard page elements.