Premium Plans Html Code Example


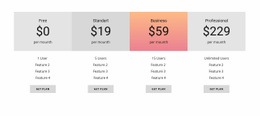
Three plan cards create defined points for custom extension
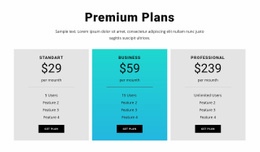
The centered “Premium Plans” heading and supporting paragraph establish the purpose before the three pricing cards begin. Each card is a bounded content region with a plan name, price, billing period, feature list, user allowance, and get plan button. The repeated structure gives custom functionality a clear relationship to the existing content: an integration concerned with plan selection can be associated with the relevant card or button rather than replacing the comparison itself.
The cards show $29, $59, and $239 per month, with 5 Users, 15 Users, and Unlimited Users respectively. Those values are presented as the block’s displayed plan content, while the feature rows provide additional comparison space. The cyan Business card is visually separated from the light gray side cards, making it a natural place to consider how an optional project-specific interaction might preserve the intended emphasis. The black buttons remain visible action regions beneath each plan.
For an HTML Code use case, custom markup or an external component could be added only where the containing project needs behavior beyond this static arrangement, such as connecting a plan button to a project-specific checkout or account flow. The section already supplies the comparison logic visually; custom functionality would extend a defined region instead of turning the block into a complete pricing system.
Customize with Nicepage
Open this ready-made template in the HTML Code Generator and customize it visually in the Nicepage editor. Replace demo content, edit page sections, and adapt the design to your project without rebuilding the template from scratch.
Edit Template Offline
2. Create a new page or select existing
3. Click Add new block, search for id 87806 and click enter
Edit Template Online
Create Awesome Websites


Free Nicepage Builder
Keywords
Extend This Page With Custom HTML Code
Insert Code With the HTML Element
Use the HTML Element to add custom code directly to a Block in the Nicepage editor. Enter the required markup in the Code field when the page needs content or functionality that is not available through the standard page elements.
Place the HTML Element in the Layout
Treat the HTML Element as part of the visual page composition. Adjust its position, width, height, alignment, and margins to place the custom content where it belongs alongside text, images, buttons, and other elements. This makes it possible to combine visually edited sections with project-specific code without separating the custom element from the rest of the layout.
Add HTML, CSS, JavaScript, and External Components
The HTML Element supports HTML, CSS, and JavaScript, allowing you to extend the page with custom markup and interactive functionality. It can also be used to embed custom code and third-party components, such as social feeds, advertising code, widgets, or other external functionality required by the project.
This workflow makes the template useful for projects that need a visual page editor together with custom HTML code, JavaScript, embedded components, and functionality beyond the standard page elements.

More from Pricing Blocks
-
-

-
-
-
-
-
-
-
-
-
Customize Any TemplateDownload
-
-
-
-
-
-
-
-
-
-