Pricing list Html Code Example


Three Pricing Rows Leave Clear Space for Section Extensions
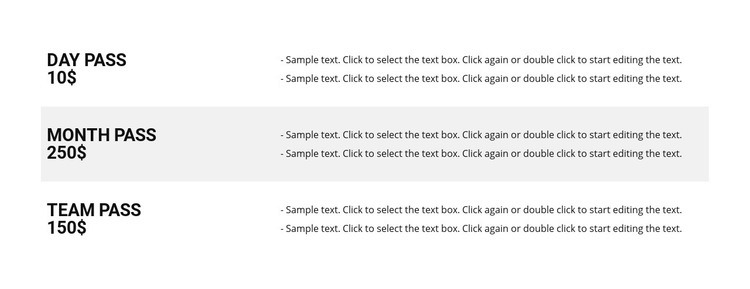
The three-row structure establishes a defined pricing region before any additional functionality is considered. Day Pass, Month Pass, and Team Pass each occupy a separate horizontal row, so a project-specific element could be associated with one option without disrupting the comparison between the three plans. The narrow left column keeps names and displayed prices together, while the wider right column carries two lines of sample description text for each pass.
Because the block is static, it does not contain a verified form, purchase control, or custom script. If a project needs an external booking, payment, eligibility, or plan-selection widget, the existing row boundaries provide logical areas for that extension. Custom HTML can be placed around the relevant pricing content while the original two-column relationship remains understandable. The alternating treatment also helps distinguish the middle option from the surrounding rows, which may be useful when an embedded component needs a visually identifiable location. In an HTML Code context, the value lies in extending this particular pricing comparison rather than replacing it with a generic code-driven interface.
Customize with Nicepage
Open this ready-made template in the HTML Code Generator and customize it visually in the Nicepage editor. Replace demo content, edit page sections, and adapt the design to your project without rebuilding the template from scratch.
Edit Template Offline
2. Create a new page or select existing
3. Click Add new block, search for id 86856 and click enter
Edit Template Online
Create Awesome Websites


Free Nicepage Builder
Keywords
Extend This Page With Custom HTML Code
Insert Code With the HTML Element
Use the HTML Element to add custom code directly to a Block in the Nicepage editor. Enter the required markup in the Code field when the page needs content or functionality that is not available through the standard page elements.
Place the HTML Element in the Layout
Treat the HTML Element as part of the visual page composition. Adjust its position, width, height, alignment, and margins to place the custom content where it belongs alongside text, images, buttons, and other elements. This makes it possible to combine visually edited sections with project-specific code without separating the custom element from the rest of the layout.
Add HTML, CSS, JavaScript, and External Components
The HTML Element supports HTML, CSS, and JavaScript, allowing you to extend the page with custom markup and interactive functionality. It can also be used to embed custom code and third-party components, such as social feeds, advertising code, widgets, or other external functionality required by the project.
This workflow makes the template useful for projects that need a visual page editor together with custom HTML code, JavaScript, embedded components, and functionality beyond the standard page elements.