In this tutorial, you will learn how to replace Images on the scroll with the Fade Effect.

Download and import the Block with the Animation Example
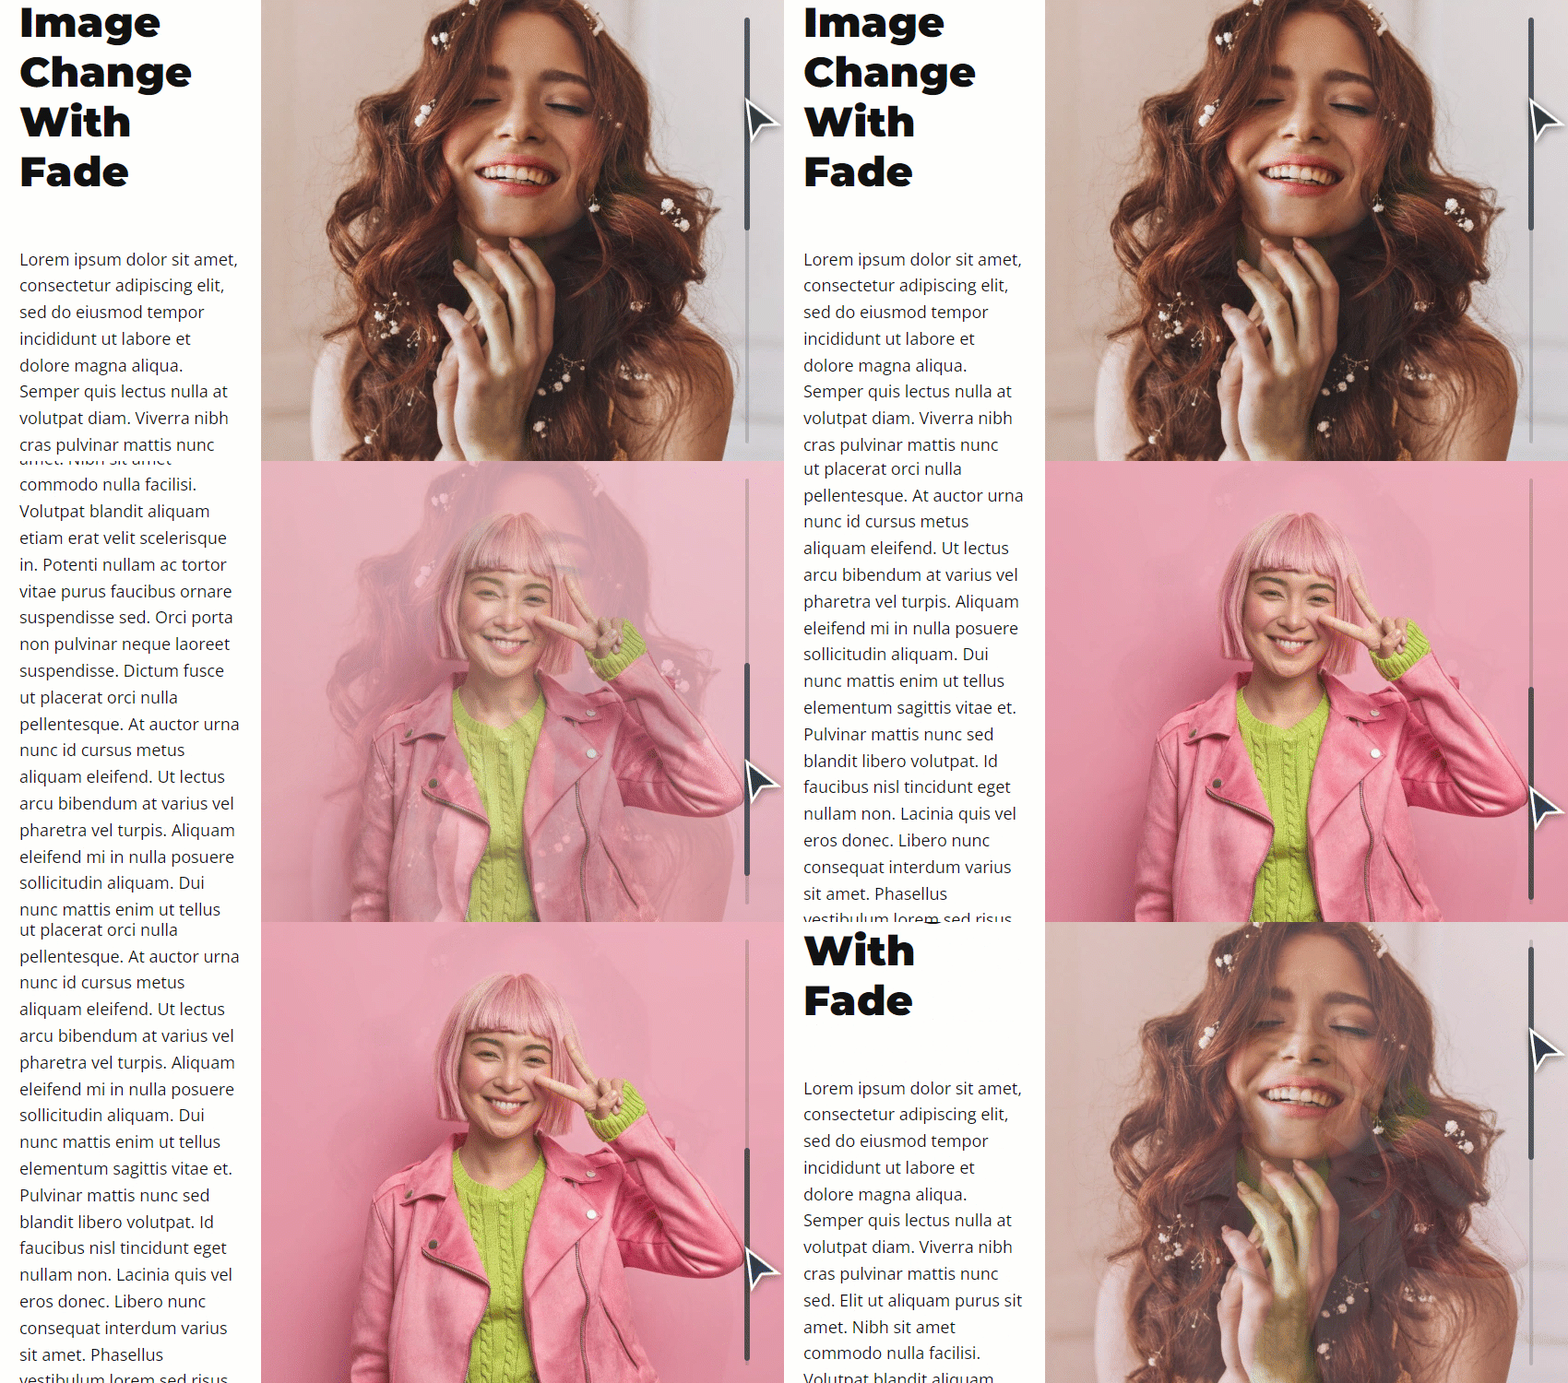
animation-image-change.gif

Add Block

  1. Add a new Block.
  2. Increase the Block Height by at least 2000.
  3. Set the Top Margin to 200.

Add Grid

  1. Add a Grid with two Cells.
  2. Resize the Cell Witdths as 1/3 by 2/3.

Add Texts

  1. Add the Header 1 and Text to Cell 1 to the left.
  2. Edit the texts.

Add Images

Switch to the Block Outline for better control of the Elements.

  1. Add the Image Element to Cell 2 to the right.
  2. Make its Width 100%
  3. Make its Height 700px.
  4. Drag and snap the Image to the Cell's top.

add-image-1.png
  1. Add another Image to Cell 2.
  2. Make its Width 100%
  3. Make its Height 700px.
  4. Drag and place it exactly over Image 1.

add-image-2.png

Set Animation Properties

For both Images, select the following.

  1. Go to the Outline.
  2. Select Image.
  3. Go to the Property Panel -> Animation On.
  4. Click the Scroll link .
  5. Select tthe Sync With Scroll (prior Step-By-Step).
  6. Trigger to the Window Bottom.

Image 1 Fade

Set the Animation Steps for Image 1 as the following.

Step 1

Set the Animation Properties as follows.

  1. Distance: 0
  2. Sticky On Scroll
  3. Transparency: 0

ani3-image1-step1.png

Step 2

Set the Animation Properties as the following.

  1. Distance: 100
  2. Sticky On Scroll
  3. Transparency: 100

ani3-image1-step2.png

Step 3

Set the Animation Properties as follows.

  1. Distance: 100
  2. Sticky On Scroll
  3. Transparency: 0

ani3-image1-step3.png

Image 2 Fade

Set the Animation Steps for Image 2 as the following.

Step 1

Set the Animation Properties as follows.

  1. Distance: 0
  2. Sticky On Scroll
  3. Transparency: 100

ani3-image2-step1.png

Step 2

Set the Animation Properties as follows.

  1. Distance: 100
  2. Sticky On Scroll
  3. Transparency: 0

ani3-image2-step2.png

Step 3

Set the Animation Properties as follows.

  1. Distance: 100
  2. Sticky On Scroll
  3. Transparency: 100

ani3-image2-step3.png

Test Animation

  1. Preview or publish the Project.
  2. Scroll the page to test the Animation.

In this tutorial, you will learn how to replace Images on the scroll with the Fade Effect. [Download and import the Block with the Animation Example](https://resources.nicepage.com/444/126444/animation-example-3.zip) ### !animation-image-change.gif! ## Add Block 1. Add a new Block. 2. Increase the Block Height by at least **2000**. 3. Set the Top Margin to **200**. ## Add Grid 1. Add a Grid with two Cells. 2. Resize the Cell Witdths as **1/3** by **2/3**. ## Add Texts 1. Add the **Header 1** and **Text** to Cell 1 to the left. 2. Edit the texts. ## Add Images Switch to the **Block Outline** for better control of the Elements. 1. Add the Image Element to Cell 2 to the right. 2. Make its Width **100%** 3. Make its Height **700px**. 4. Drag and snap the Image to the **Cell's top**. ### !add-image-1.png! 1. Add another Image to Cell 2. 2. Make its Width **100%** 3. Make its Height **700px**. 4. Drag and place it **exactly over** Image 1. ### !add-image-2.png! ## Set Animation Properties For both Images, select the following. 1. Go to the Outline. 3. Select **Image**. 4. Go to the Property Panel -> Animation On. 5. Click the **Scroll** link . 6. Select tthe **Sync With Scroll** (prior Step-By-Step). 7. Trigger to the **Window Bottom**. ### Image 1 Fade Set the Animation Steps for **Image 1** as the following. #### Step 1 Set the Animation Properties as follows. 1. Distance: **0** 2. **Sticky On Scroll** 3. Transparency: **0** ### !ani3-image1-step1.png! #### Step 2 Set the Animation Properties as the following. 1. Distance: **100** 2. **Sticky On Scroll** 3. Transparency: **100** ### !ani3-image1-step2.png! #### Step 3 Set the Animation Properties as follows. 1. Distance: **100** 2. **Sticky On Scroll** 3. Transparency: **0** ### !ani3-image1-step3.png! ### Image 2 Fade Set the Animation Steps for **Image 2** as the following. #### Step 1 Set the Animation Properties as follows. 1. Distance: **0** 2. **Sticky On Scroll** 3. Transparency: **100** ### !ani3-image2-step1.png! #### Step 2 Set the Animation Properties as follows. 1. Distance: **100** 2. **Sticky On Scroll** 3. Transparency: **0** ### !ani3-image2-step2.png! #### Step 3 Set the Animation Properties as follows. 1. Distance: **100** 2. **Sticky On Scroll** 3. Transparency: **100** ### !ani3-image2-step3.png! ## Test Animation 1. Preview or publish the Project. 2. Scroll the page to test the Animation. ## Related - [Animation Sync With Scroll](page:485289) - [Animation Example 1](page:484921) - [Animation Example 2](page:484924) - [Animation Example 4](page:490188) - [Animation Example 5](page:490194) - [Animation Example 6](page:490195) ##