Summary
- Overview
- Run Nicepage
- Page Navigator
- Active Block
- Header and Footer Presets
- Block Menu
- Reset Responsive
Overview
All modern websites have blocked layouts. In Nicepage, you can build your website, starting with the Blank, Preset, or Predesigned Blocks.
Run Nicepage
All Nicepage editions have the same Editor interface. This example will use the Desktop Application for Windows or Mac OS.
- Run the Desktop Application.
- You can also use the WordPress Plugin or Joomla Extension.
- Add a New Website.
- Start with the Blank Page.
Page Navigator
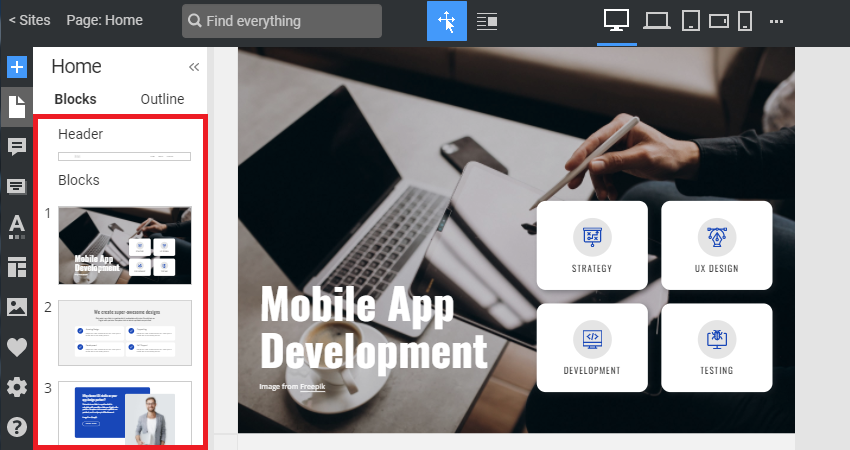
Use the Page Navigator to the left to select, move, and apply options to Site Blocks.

There are two Blocks and Outline Tabs in the Page Navigator. In the Blocks Tab, you see the Block Thumbnails. In the Outline, you can see each Block's structure and navigate to Elements in the Block.
Active Block
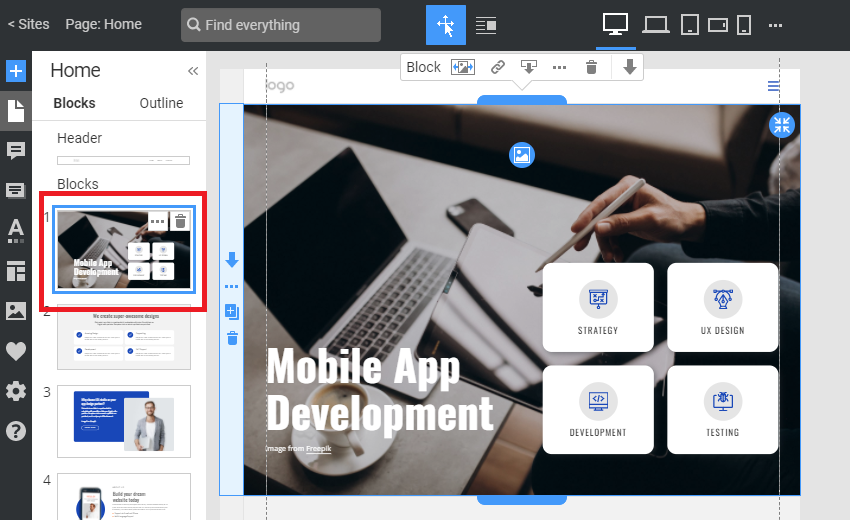
In the Page Navigator, the active Block is highlighted with the blue border. There is also the blue border around the Block and the blue Sidebar.

Blocks divide a web page horizontally and contain other Elements, like Texts, Images, Shapes, etc. All Elements are added directly to Blocks.
Block Menu
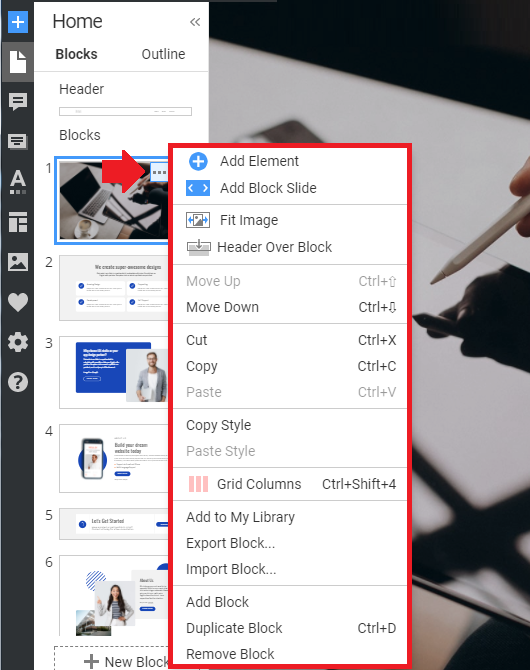
Each Block has a Menu containing Block operations. You can click the Options icon on the Block Thumbnail in the Page Navigator, Side Panel, or Context Toolbar.

If you copy a Block, you copy its elements with the styling.
Reset Responsive
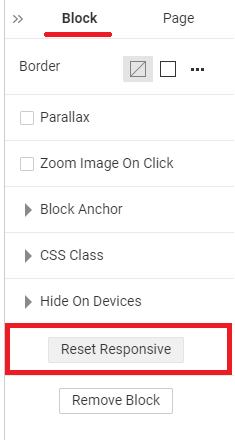
The Nicepage builds Responsive Modes automatically. You can also edit everything in all Responsive Modes.

And if you don't like the result, you can always reset the Responsive Modes to return to the automatically generated variants.
- Select any Block
- Go to the Property Panel.
- Scroll the Panel down.
- Click on the Reset Responsive button.
- Go to the Top Bar.
- Switch the Modes to test.
Please read about the Responsive Modes.
## Summary - Overview - Run Nicepage - Page Navigator - Active Block - Header and Footer Presets - Block Menu - Reset Responsive ## Overview All modern websites have blocked layouts. In Nicepage, you can build your website, starting with the Blank, Preset, or Predesigned Blocks. ## Run Nicepage All Nicepage editions have the same Editor interface. This example will use the Desktop Application for Windows or Mac OS. 1. Run the Desktop Application. 2. You can also use the WordPress Plugin or Joomla Extension. 3. Add a New Website. 4. Start with the Blank Page. ## Page Navigator Use the Page Navigator to the left to select, move, and apply options to Site Blocks. !page-navigator.png! There are two Blocks and Outline Tabs in the Page Navigator. In the Blocks Tab, you see the Block Thumbnails. In the Outline, you can see each Block's structure and navigate to Elements in the Block. ## Active Block In the Page Navigator, the active Block is highlighted with the blue border. There is also the blue border around the Block and the blue Sidebar. !active-block.png! Blocks divide a web page horizontally and contain other Elements, like Texts, Images, Shapes, etc. All Elements are added directly to Blocks. ## Block Menu Each Block has a Menu containing Block operations. You can click the Options icon on the Block Thumbnail in the Page Navigator, Side Panel, or Context Toolbar. !block-menu.png! If you copy a Block, you copy its elements with the styling. ## Reset Responsive The Nicepage builds Responsive Modes automatically. You can also edit everything in all Responsive Modes. !block-reset-responsive.png! And if you don't like the result, you can always reset the Responsive Modes to return to the automatically generated variants. 1. Select any Block 2. Go to the Property Panel. 3. Scroll the Panel down. 3. Click on the Reset Responsive button. 4. Go to the Top Bar. 5. Switch the Modes to test. Please read about the [Responsive Modes](page:5249). ##