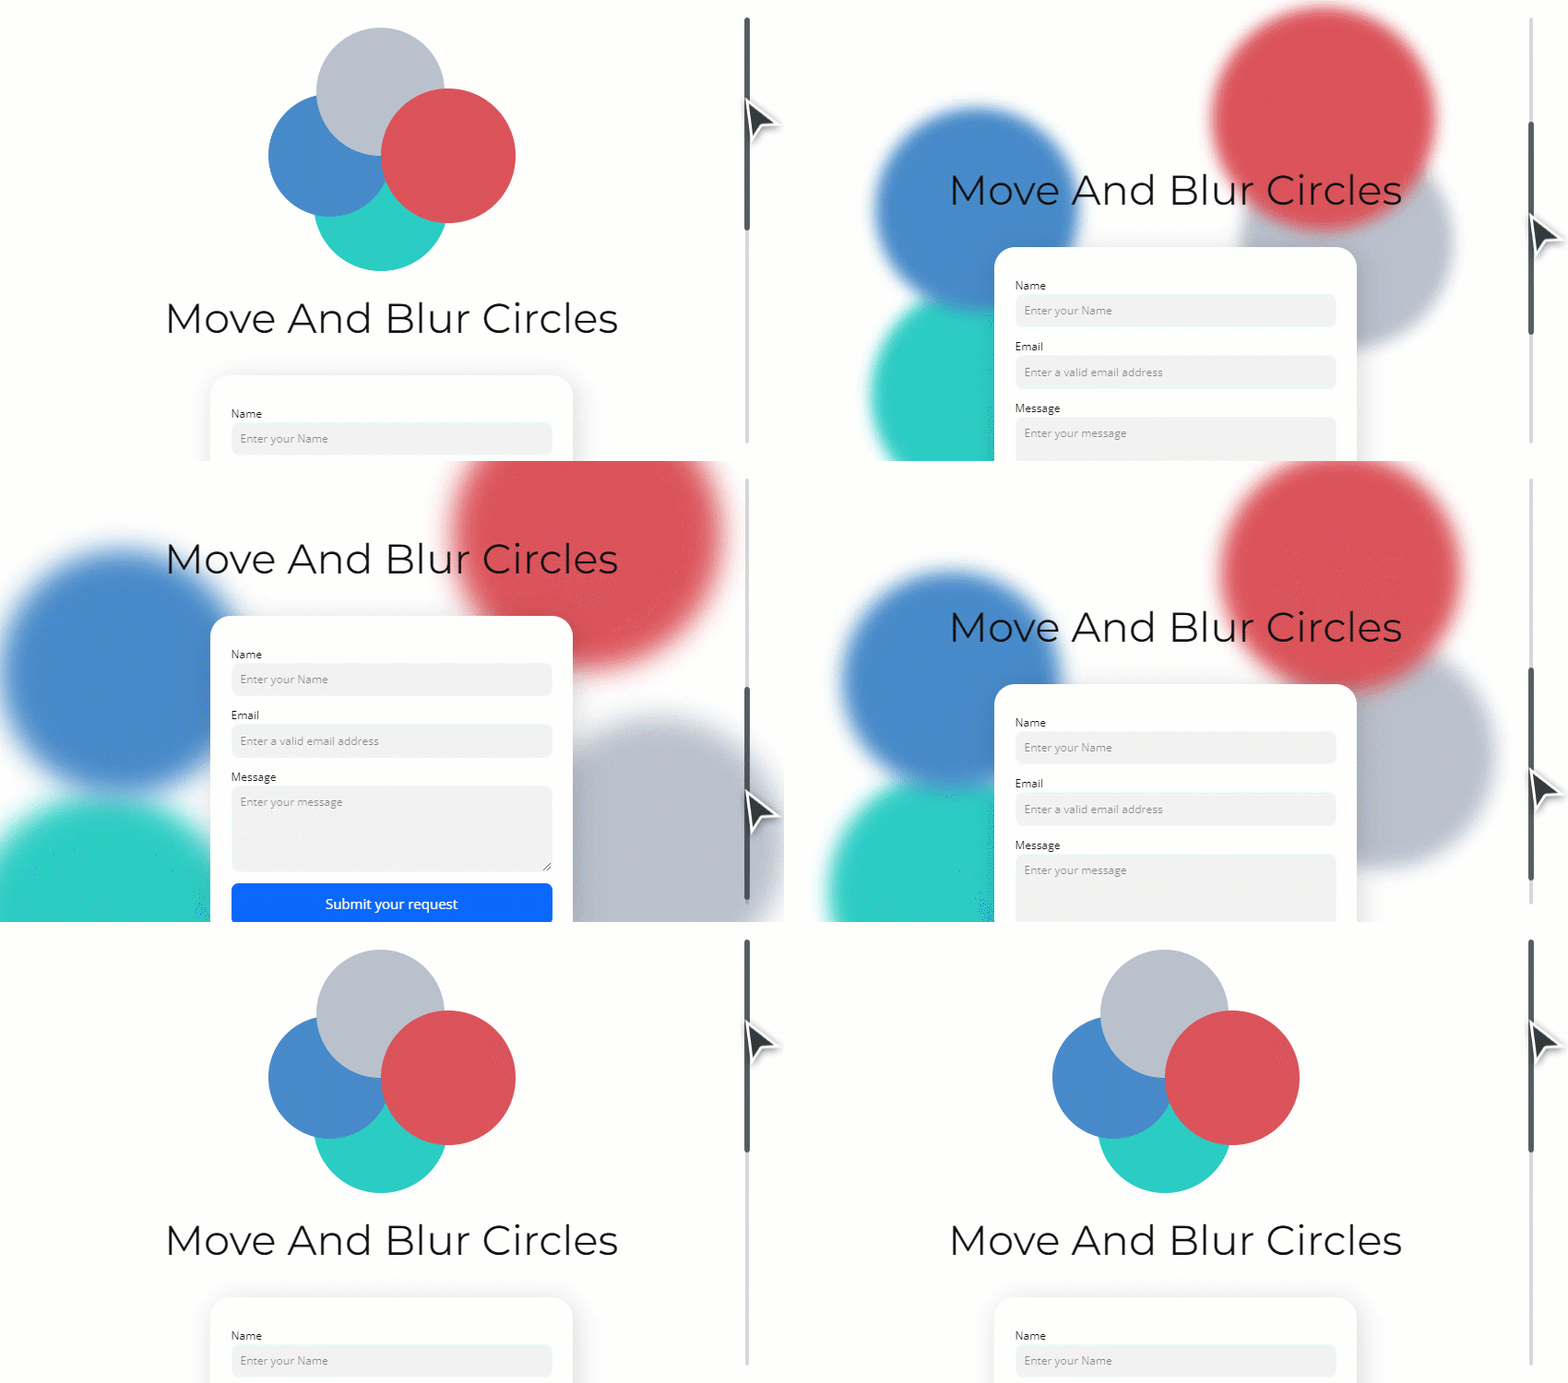
This tutorial teaches you how to move multiple shapes with Scale and Blur Fade Effects on the scroll.
Download and import the Block with this Animation Example
Add Block
- Add a new Block.
- Increase the Block Height by at least 2000.
- Set the Top Margin to 200.
Add Shapes
- Add four Circle Shapes.
- Change the Circles' Color
- Resize if needed.
- Overlap the Circles like the following.
Add Other Elements
- Add and edit the Heading.
- Add the Contact Form Element.
- Modify it if needed.
Set Animation Properties
For each Circle, start with the following.
- Select the Shape.
- Go to the Property Panel -> Animation On.
- Click the Scroll link .
- Select tthe Sync With Scroll (prior Step-By-Step).
- Trigger on the Window Bottom.
Move Circle 1
Set the Animation properties as the following.
- Distance: 20 (It is 50 by default)
- Move X: -400
- Move Y: 700p
- Scale: 200
- Blur: 10
Move Circle 2
Set the Animation properties as the following.
- Distance: 20 (It is 50 by default)
- Move X: -300
- Move Y: 400
- Scale: 200
- Blur: 10
Move Circle 3
Set the Animation properties as the following.
- Distance: 20 (It is 50 by default)
- Move X: 400
- Move Y: 600
- Scale: 200
- Blur: 10
Move Circle 4
Set the Animation properties as the following.
- Distance: 20 (It is 50 by default)
- Move X: 200
- Move Y: 200
- Scale: 200
- Blur: 10
Test Animation
- Preview or publish the project.
- Scroll the Page to test the Animation.
This tutorial teaches you how to move multiple shapes with Scale and Blur Fade Effects on the scroll.
[Download and import the Block with this Animation Example](https://resources.nicepage.com/445/126445/animation-example-2.zip)
###
!animation-move-expand-blur.gif!
## Add Block
1. Add a new Block.
2. Increase the Block Height by at least **2000**.
3. Set the Top Margin to **200**.
## Add Shapes
1. Add four Circle Shapes.
2. Change the Circles' Color
3. Resize if needed.
4. Overlap the Circles like the following.
##
!overlap-circles.png!
## Add Other Elements
1. Add and edit the Heading.
2. Add the Contact Form Element.
3. Modify it if needed.
## Set Animation Properties
For each Circle, start with the following.
1. Select the Shape.
2. Go to the Property Panel -> Animation On.
3. Click the **Scroll** link .
4. Select tthe **Sync With Scroll** (prior Step-By-Step).
5. Trigger on the **Window Bottom**.
### Move Circle 1
Set the Animation properties as the following.
1. Distance: **20** (It is 50 by default)
2. Move X: **-400**
3. Move Y: **700p**
4. Scale: **200**
5. Blur: **10**
###
!ani2-circle1.png!
### Move Circle 2
Set the Animation properties as the following.
1. Distance: **20** (It is 50 by default)
2. Move X: **-300**
3. Move Y: **400**
4. Scale: **200**
5. Blur: **10**
###
!ani2-circle2.png!
### Move Circle 3
Set the Animation properties as the following.
1. Distance: **20** (It is 50 by default)
2. Move X: **400**
3. Move Y: **600**
4. Scale: **200**
5. Blur: **10**
###
!ani2-circle3.png!
### Move Circle 4
Set the Animation properties as the following.
1. Distance: **20** (It is 50 by default)
2. Move X: **200**
3. Move Y: **200**
4. Scale: **200**
5. Blur: **10**
###
!ani2-circle4.png!
## Test Animation
1. Preview or publish the project.
2. Scroll the Page to test the Animation.
## Related
- [Animation Sync With Scroll](page:485289)
- [Animation Example 1](page:484921)
- [Animation Example 3](page:484922)
- [Animation Example 4](page:490188)
- [Animation Example 5](page:490194)
- [Animation Example 6](page:490195)
##


