Modern Web Design usually has two pages: long-read articles and web pages. It is an article if you read a long text, such as news, blog posts, or any other long-read content that usually takes the whole sheet width and height.
The Box is an Element that combines elements like headings, texts, icons, buttons, lines, and shapes, allowing you to add a background or border.
The Box's benefit in terms of Responsiveness to Mobile Views is undeniable. The Box adjusts inner elements automatically for smaller screens to fit the screen width.
Add Elements To Box
Now let’s see how Boxes are used.
Add a Box.
Select Add -> Box or
Press the “Alt+P” hotkey.
Let’s add Elements to the Box. You can add text elements via the Add menu or by clicking the small plus at the top right corner of the selected Box. You can also use the hotkeys in the Add menu to the right.
Move Elements
Select the Box.
Add Heading 2, Text, and Button.
Let’s also add an Icon.
Click Add -> Icon, or
Press the “Alt+O” hotkey.
In the dialog, enter “idea” into the search field. Select this Icon. To change the element order, select the element. Click the Up and the Down Arrows in the element toolbar or press Ctrl with the Up/Down arrows to switch the element order.
Move the Icon over all other elements in the Box.
Add More Elements
Add an element after the current one, select this element, and then add a new one via the Add menu.
Click Add-> Text -> Subtitle.
Modify the Subtitle.
Add more text to the text element.
You see that this element and the Box grow down automatically. The Box also grows while adding more Elements. Change the Box Height and Width by pulling the markers on the Box borders.
Customize Box
There are several operations available for the selected Box in the Property Panel. It is effortless to add the common background under the Box elements.
Enable the Fill in the Property Panel to the right.
Change the Background Color.
Move the elements.
Resize, if needed.
Drag the element and then drag it back into the Box.
While moving in and out, you see the tooltip showing where the element is placed.
Arrange Elements
Align the elements with the magnetic guides that are very handy, as always. Also, use Auto-align in the Property Panel.
Select the Box and
Click the Arrange buttons to align elements horizontally and vertically.
Padding And Spacing
You can add horizontal padding by clicking and pulling the left marker to the right and the right one to the left. You can modify the Spacing and Alignment properties for the Box element. In the Property Panel, select a Box and see the Top, Bottom, Left, and Right Spacing.
Align Box
You can also apply the Alignment to a Box by clicking the corresponding icons at the top of the Property Panel.
Box In Responsive Modes
The main benefit of using the Box is that you do not usually need to make additional settings for the inner texts in the Responsive Modes.
## Summary
- Overview
- Video Lesson
- How To Use Box
- Add Elements To Box
- Customize Box
- Box In Responsive Modes
## Overview
Modern Web Design usually has two pages: long-read articles and web pages. It is an article if you read a long text, such as news, blog posts, or any other long-read content that usually takes the whole sheet width and height.
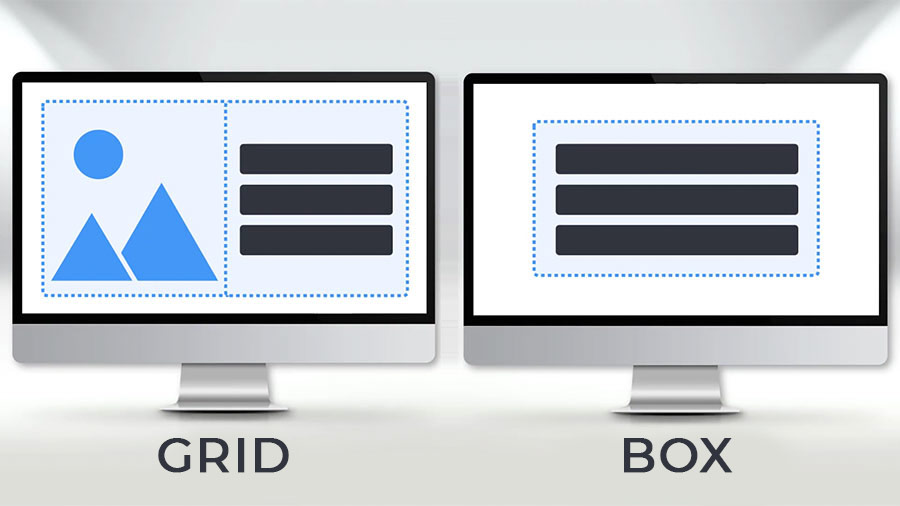
The Box is an Element that combines elements like headings, texts, icons, buttons, lines, and shapes, allowing you to add a background or border.
!grid-box.jpg!
## Video Lesson
##
<iframe width="600" height="330" src="https://www.youtube.com/embed/_c4MX0JZjWU" title="Nicepage Lesson: Box Element" frameborder="0" allow="accelerometer; autoplay; clipboard-write; encrypted-media; gyroscope; picture-in-picture" allowfullscreen></iframe>
### See Also
[More video lessons](page:1318)
The Box's benefit in terms of Responsiveness to Mobile Views is undeniable. The Box adjusts inner elements automatically for smaller screens to fit the screen width.
## Add Elements To Box
Now let’s see how Boxes are used.
1. Add a Box.
2. Select Add -> Box or
3. Press the “Alt+P” hotkey.
Let’s add Elements to the Box. You can add text elements via the Add menu or by clicking the small plus at the top right corner of the selected Box. You can also use the hotkeys in the Add menu to the right.
### Move Elements
1. Select the Box.
2. Add Heading 2, Text, and Button.
Let’s also add an Icon.
1. Click Add -> Icon, or
2. Press the “Alt+O” hotkey.
In the dialog, enter “idea” into the search field. Select this Icon. To change the element order, select the element. Click the Up and the Down Arrows in the element toolbar or press Ctrl with the Up/Down arrows to switch the element order.
Move the Icon over all other elements in the Box.
### Add More Elements
Add an element after the current one, select this element, and then add a new one via the Add menu.
1. Click Add-> Text -> Subtitle.
2. Modify the Subtitle.
3. Add more text to the text element.
You see that this element and the Box grow down automatically. The Box also grows while adding more Elements. Change the Box Height and Width by pulling the markers on the Box borders.
## Customize Box
There are several operations available for the selected Box in the Property Panel. It is effortless to add the common background under the Box elements.
1. Enable the Fill in the Property Panel to the right.
2. Change the Background Color.
3. Move the elements.
4. Resize, if needed.
5. Drag the element and then drag it back into the Box.
While moving in and out, you see the tooltip showing where the element is placed.
### Arrange Elements
Align the elements with the magnetic guides that are very handy, as always. Also, use Auto-align in the Property Panel.
1. Select the Box and
2. Click the Arrange buttons to align elements horizontally and vertically.
### Padding And Spacing
You can add horizontal padding by clicking and pulling the left marker to the right and the right one to the left. You can modify the Spacing and Alignment properties for the Box element. In the Property Panel, select a Box and see the Top, Bottom, Left, and Right Spacing.
### Align Box
You can also apply the Alignment to a Box by clicking the corresponding icons at the top of the Property Panel.
## Box In Responsive Modes
The main benefit of using the Box is that you do not usually need to make additional settings for the inner texts in the Responsive Modes.
## See Also
- [Responsive Design with Nicepage](page:5249)
- [How to use the Menu element](page:9801)
- [How to use the Grid element](page:17389)
- [How to use the Block](page:18664)
##