Jak chronić stronę internetową hasłem

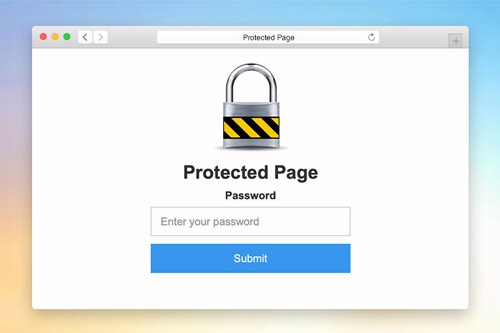

Szablon hasła strony
Aby ustawić okno dialogowe Ochrona hasłem dla projektu serwisu WWW, musisz zmodyfikować Szablon ochrony strony. Jak każdy inny szablon, szablon ochrony strony można znaleźć w panelu Szablony szybkiego dostępu. Kliknij ten link do szablonu, aby otworzyć go w Edytorze. Modyfikować. Możesz wyświetlić podgląd tego szablonu w Szybkim podglądzie lub w wyeksportowanej witrynie dla chronionych stron.
Stylizacja formularza hasła
Jak każdy inny formularz kontaktowy na stronie internetowej, możesz wystylizować formularz hasła. Wybierz formę w Bloku. Przejdź do panelu właściwości i kliknij odpowiednie łącza, aby uzyskać dostęp do paneli, aby zmodyfikować wypełnienie, odstępy i wszystkie inne dostępne właściwości formularza.

Ustawienia ochrony hasłem strony
Możesz ustawić Ochronę Strony hasłem w Panelu Właściwości Strony. Jeśli zostanie wprowadzony, nie będzie mógł uzyskać dostępu do strony, dopóki nie wprowadzisz hasła. Wchodząc na chronioną stronę, użytkownik musi wprowadzić hasło tylko raz. Jeśli dwie osoby mają to samo hasło, nie ma potrzeby ponownego wpisywania hasła.
Ochrona strony hasłem w WordPress
Ochrona strony hasłem z Nicepage jest zintegrowana z WordPress. Możesz to ustawić w ustawieniach strony i panelu właściwości. Ponadto nadal możesz korzystać z domyślnej ochrony strony hasłem dostępnej w WordPress, ponieważ jest ona w pełni obsługiwana.


Ochrona strony hasłem w Joomla
W Joomla ochrona hasłem strony jest zintegrowana z Nicepage i możesz ustawić hasło zarówno w Joomla, jak i Nicepage Page Settings.
Ochrona strony hasłem w edytorze online
Możesz ustawić hasło, aby chronić strony w edytorze Nicepage online. Możesz także chronić strony publikujące strony internetowe w Nicepage Hosting przed aplikacjami Nicepage w systemach Windows i Mac OS.

How To Use The Password Protection On Pages
The page password helps to secure every aspect of your page and prevent it from being deleted or altered. There are many ways to password protect an individual page or to protect custom post type, but our builder provides one of the easiest ways to password protect the page. Click on the page for which you need to add protection, and go to the Properties Panel on the right. At the bottom, you will find the enable Password Protection section, where you can enter the password you require to set up. Only personnel whose user roles allow them will be able to enter the password before modifying the page. Before joining, the sitewide login page will appear, stating that they need to enter the page password. Once they enter the password, the built-in password protected content of entire site will be available. The user roles which do not have access to the protected page will not have the page password and will to be able to enter it.
The built-in protection provides the sitewide password form you can set up and use to password protect the categories on the password-protected page. The custom page templates will help you customize the login page templates making them unique or similar to password protect WordPress pages. The questions about how to password the landing page website or password protect WordPress content and password protect Woocommerce products can often occur. Our builder uses a login page where visitors need to enter a password they will receive from you via email or message. There are also ways to password protect WordPress PPWP using a plugin applicable for landing pages and WordPress custom post types.
The WordPress login page plugins add new features and allow you to choose password protected of page content without additional complications. Our protection templates can hide and add password-protected content or unlock the protected content using our simple navigation. Add a password-protected page later post with a single password form or the same password for multiple landing pages. To password protect Woocommerce Product, you need to enter a new password, the same way as to protect WordPress custom post information. To password protect WordPress categories of any landing page, enable the page password so the system would display a form where users would be prompted to enter a password to review the password protected categories.