The Page Navigator helps you navigate the built web page and provides a comfortable view of the project layout.
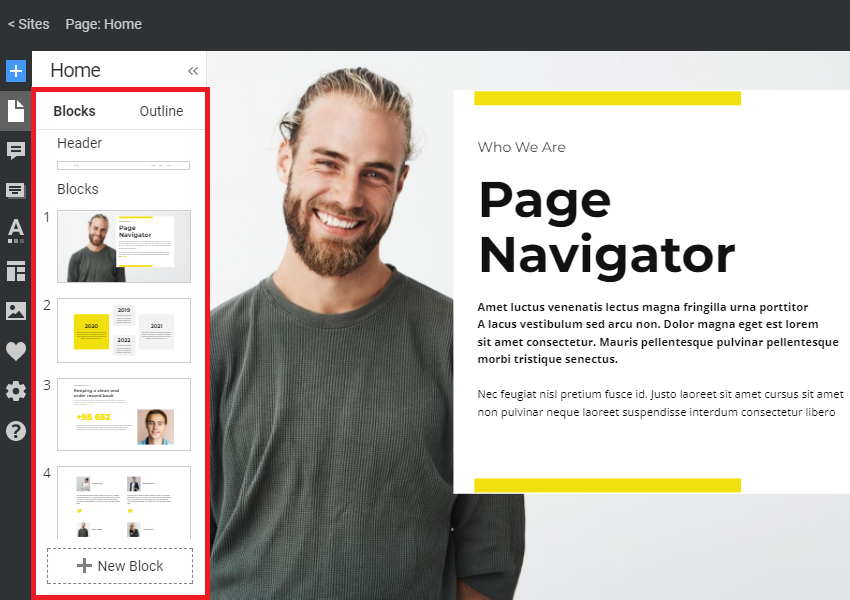
Header Block
The Header is the top Block shown on all web pages of a website. You can hide the Header on some responsive views and change its layout if needed.
It usually contains the Logo, Menu, and other Elements. You can also split it into several Header Rows.

Footer Block
The Footer is the bottom Block shown on all web pages of a website. You can add various Elements to the Footer, including some commonly used ones like Social Media.

Page Blocks
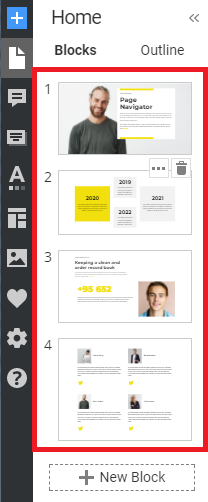
Any web page consists of Blocks. You can use Blocks to add Elements building layouts accordingly to the requirements.
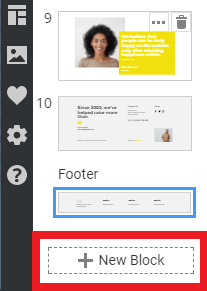
Add A New Block
You can add a new Block by clicking the New Block button at the bottom of the Page Navigator.
Move Blocks
Select the Block and drag it up and down in the Page Navigator.
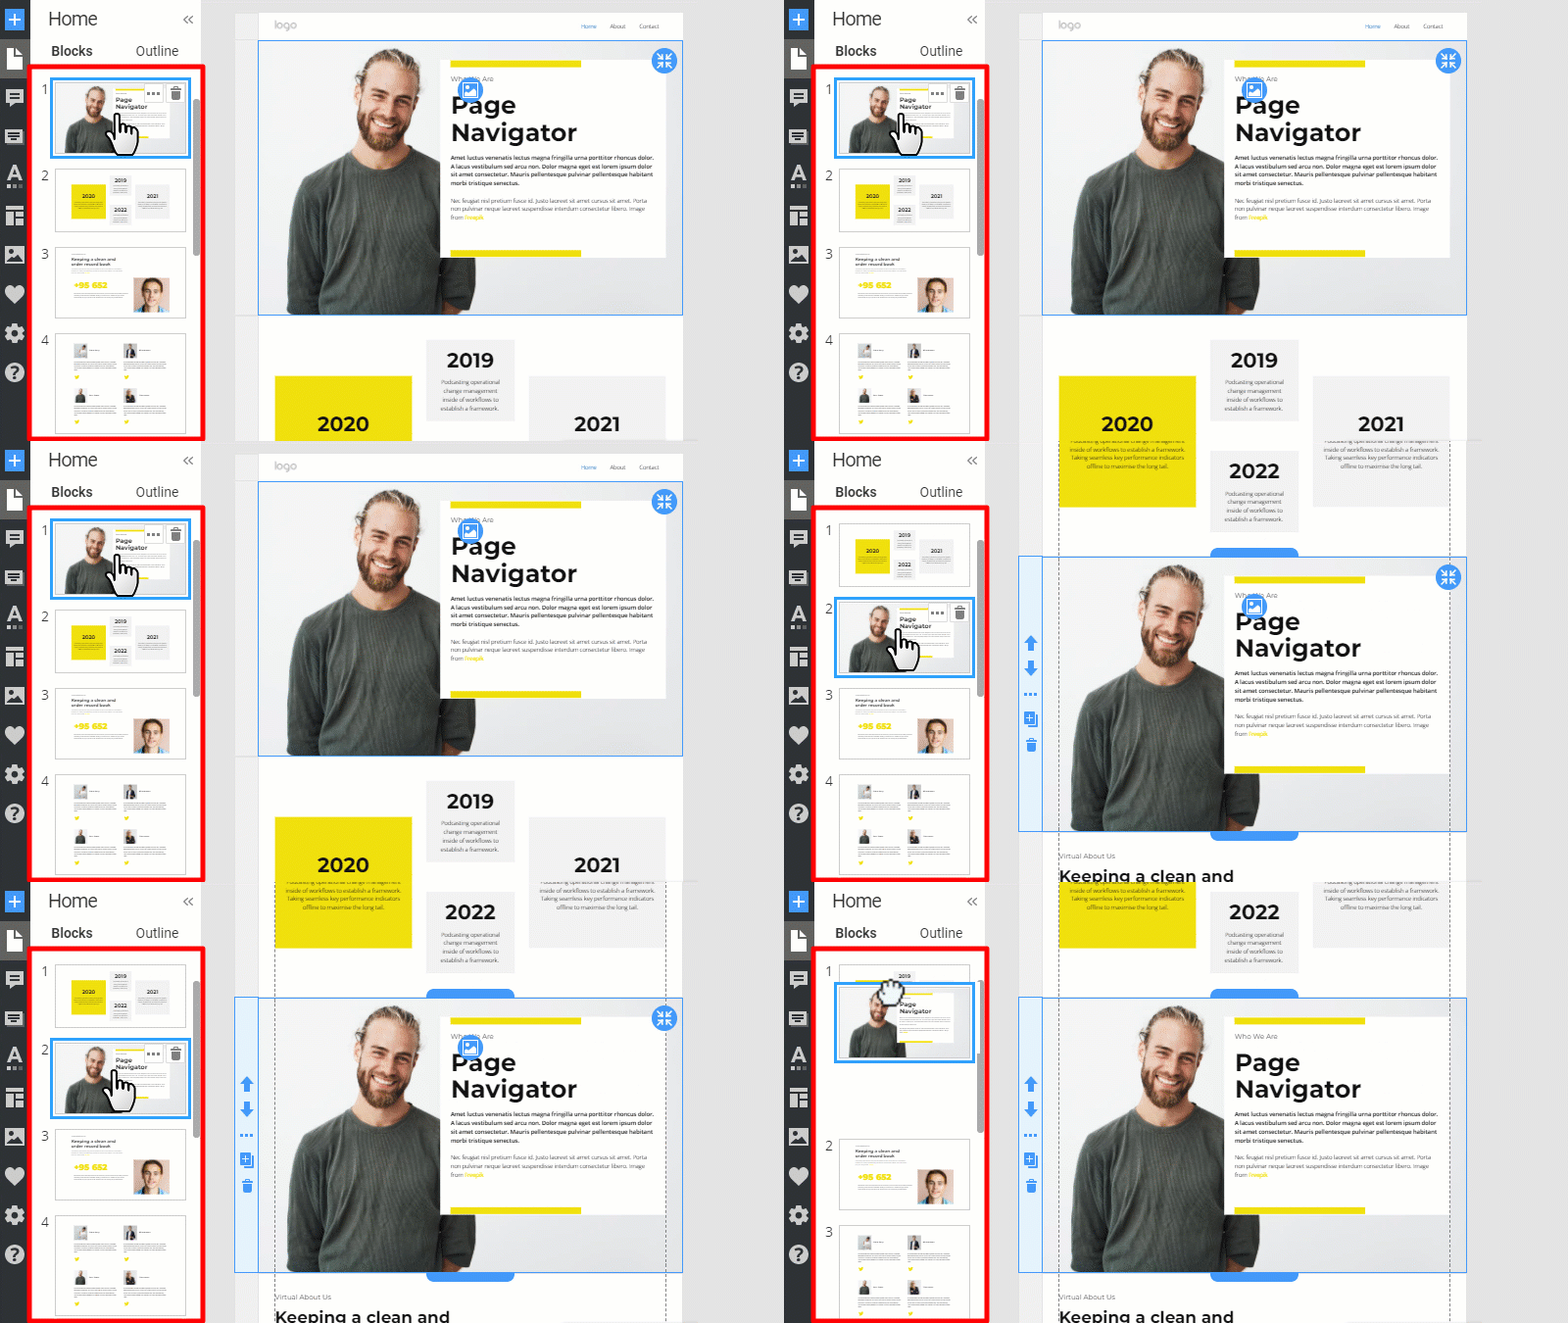
Alternatively, you can also click on the arrow icon on the left side of the Block or choose the appropriate operation in the Block Context Menu.
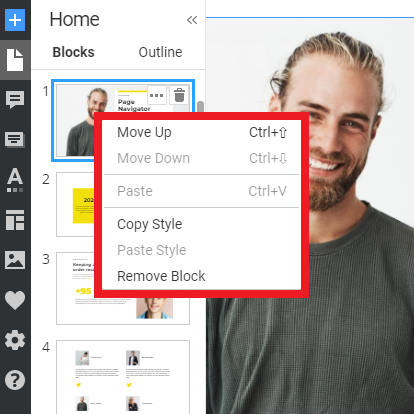
Block Context Menu
Click the Right Mouse key on the Block thumbnail to open the Context Menu. You can find the Move Block, Copy, Paste, etc. operations for the selected Block.
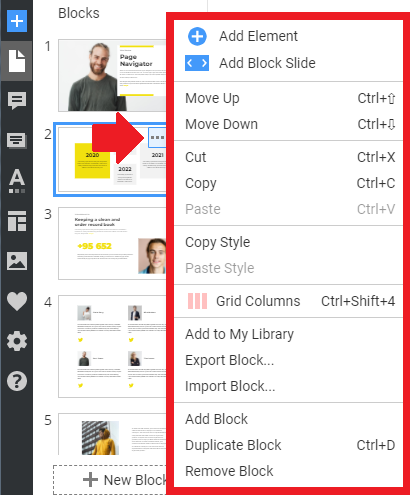
Block Options
You can click on the Options icon to open the Block Options Menu. Here you can find all operations related to Blocks.
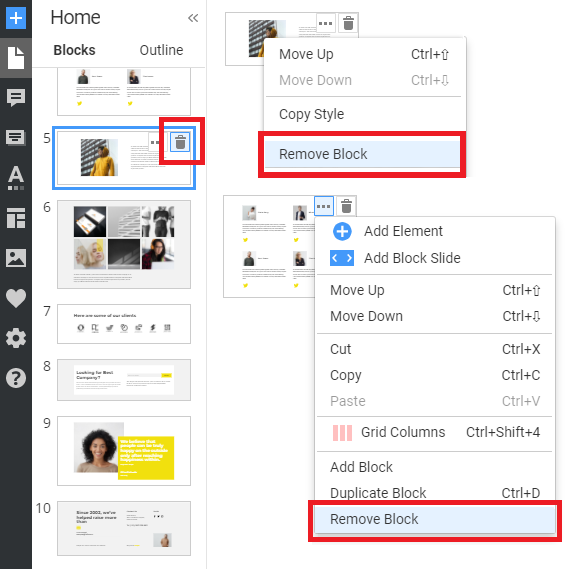
Delete Block
Click on the Bucket icon on the Block thumbnail. You can also click the Delete Block in the left Context Menu or Block Options, press the DEL key, or click on the Delete Block button in the Property Panel for the selected Block.
NOTE: You can easily undo the Delete Block operation by pressing the CTRL+Z keys or clicking the Undo icon on the Top Bar.
The Page Navigator helps you navigate the built web page and provides a comfortable view of the project layout. !page-navigator.png! ## Header Block The Header is the top Block shown on all web pages of a website. You can hide the Header on some responsive views and change its layout if needed. It usually contains the Logo, Menu, and other Elements. You can also split it into several Header Rows. !header.png! ## Footer Block The Footer is the bottom Block shown on all web pages of a website. You can add various Elements to the Footer, including some commonly used ones like Social Media. !footer.png! ## Page Blocks Any web page consists of Blocks. You can use Blocks to add Elements building layouts accordingly to the requirements. !page-blocks.png! ### Add A New Block You can add a new Block by clicking the New Block button at the bottom of the Page Navigator. !add-block-page-navigator.png! ### Move Blocks Select the Block and drag it up and down in the Page Navigator. !move-blocks.gif! Alternatively, you can also click on the arrow icon on the left side of the Block or choose the appropriate operation in the Block Context Menu. ### Block Context Menu Click the Right Mouse key on the Block thumbnail to open the Context Menu. You can find the Move Block, Copy, Paste, etc. operations for the selected Block. !block-context-menu.png! ### Block Options You can click on the Options icon to open the Block Options Menu. Here you can find all operations related to Blocks. !block-options-menu.png! ### Delete Block Click on the Bucket icon on the Block thumbnail. You can also click the Delete Block in the left Context Menu or Block Options, press the DEL key, or click on the [Delete Block](page:304365) button in the Property Panel for the selected Block. !delete-block.png! NOTE: You can easily undo the Delete Block operation by pressing the CTRL+Z keys or clicking the Undo icon on the Top Bar. ##